Contents
- 1 What is Chinking and Why It’s Essential
- 2 Choosing the Right Chinking Material
- 3 Traditional Mortar Chinking Method
- 4 Modern Synthetic Chinking (Easier Alternative)
- 5 Step-by-Step Application Guide
- 6 Keeping Your Log Home in Perfect Condition
- 7 FAQ
- 7.0.1 Can I just fill log gaps with spray foam instead of doing real log cabin chinking?
- 7.0.2 Is log cabin chinking safe around kids and pets, or are the fumes bad?
- 7.0.3 Do I need a contractor for cabin chinking or can I DIY without getting in trouble with inspectors?
- 7.0.4 How long should I wait before staining or painting around new chinking so it doesn’t peel?
- 7.0.5 Can I use regular concrete mix for DIY log cabin chinking, or will that hold up?
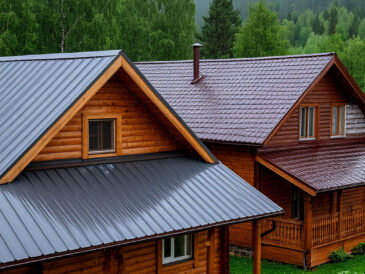
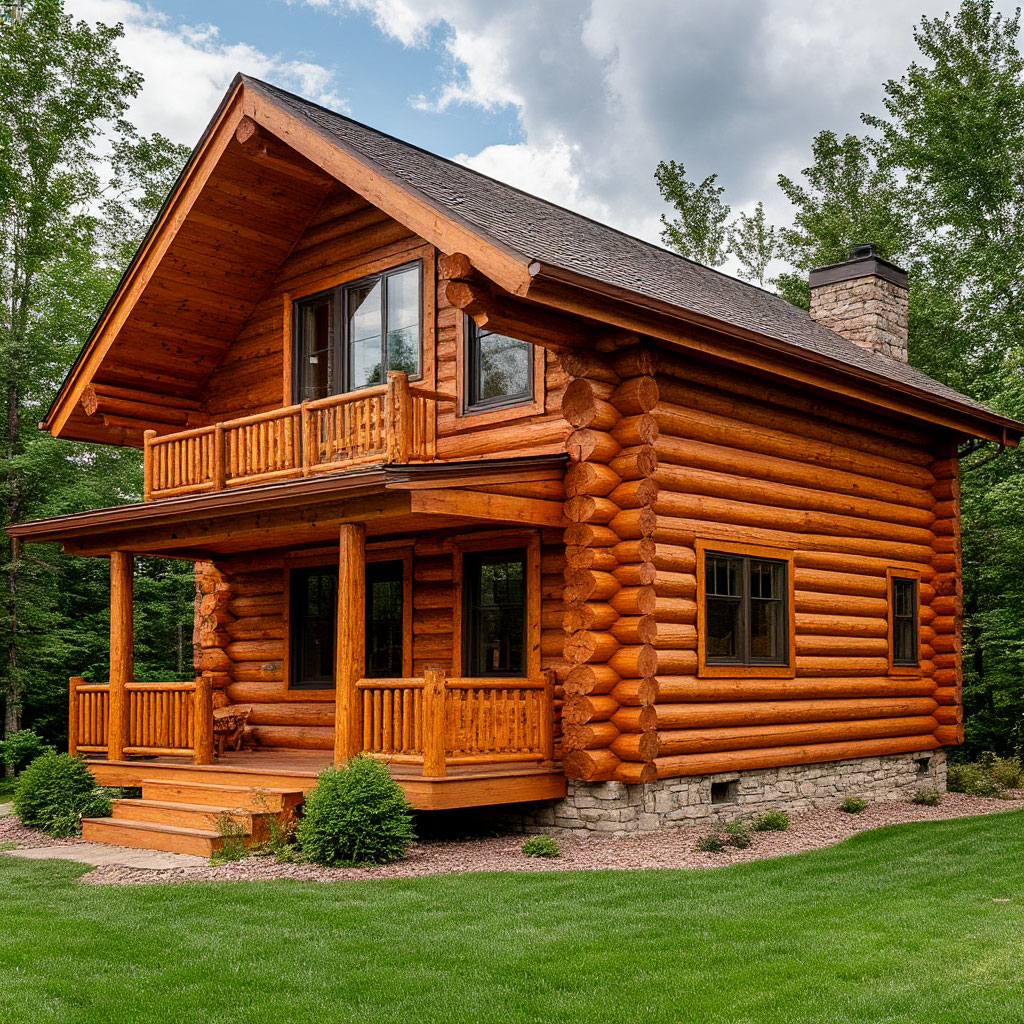
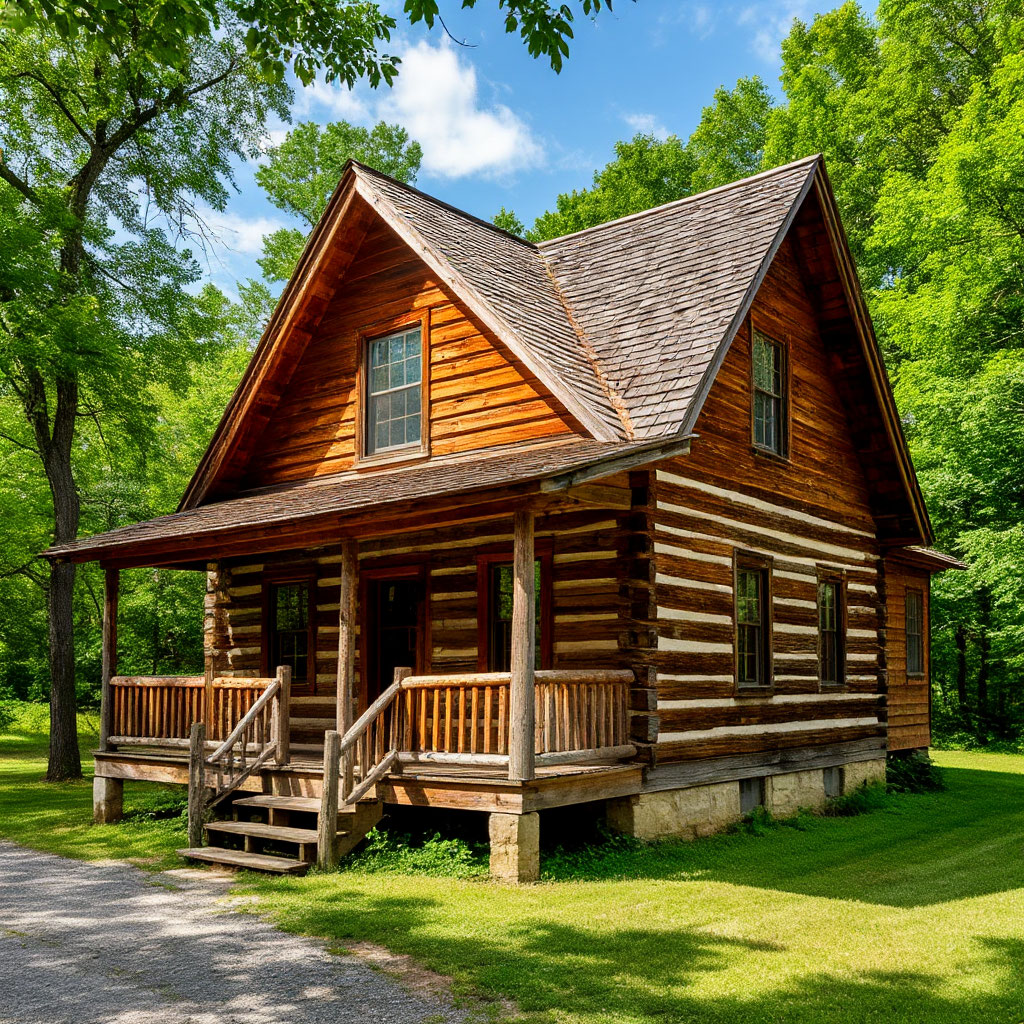
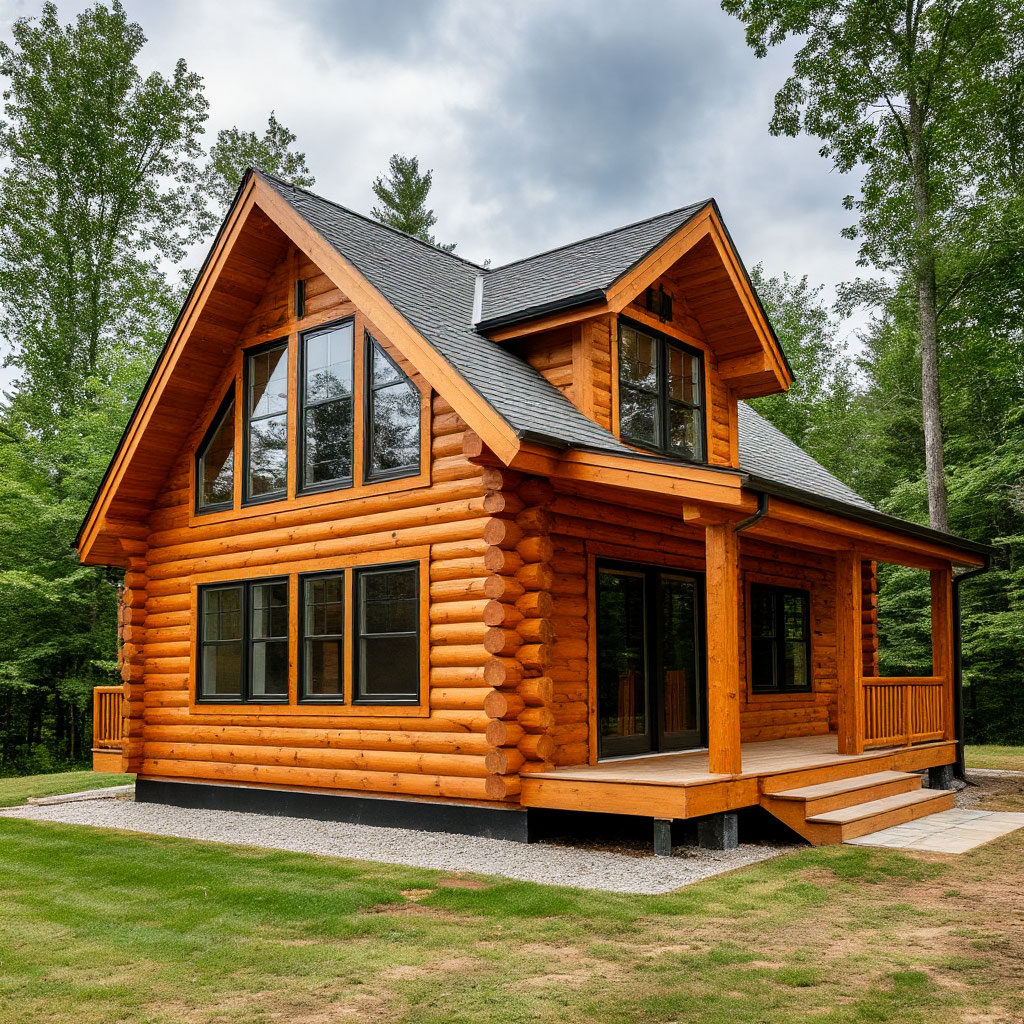
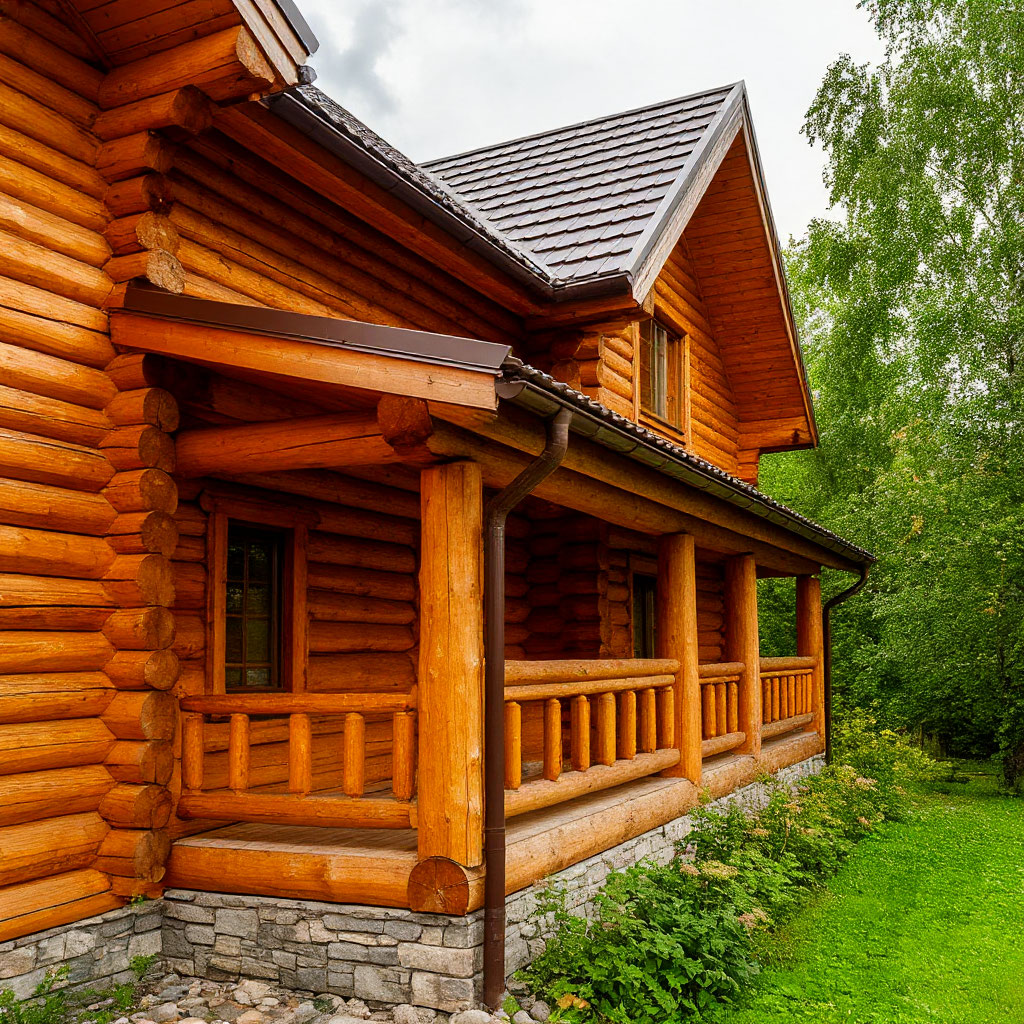
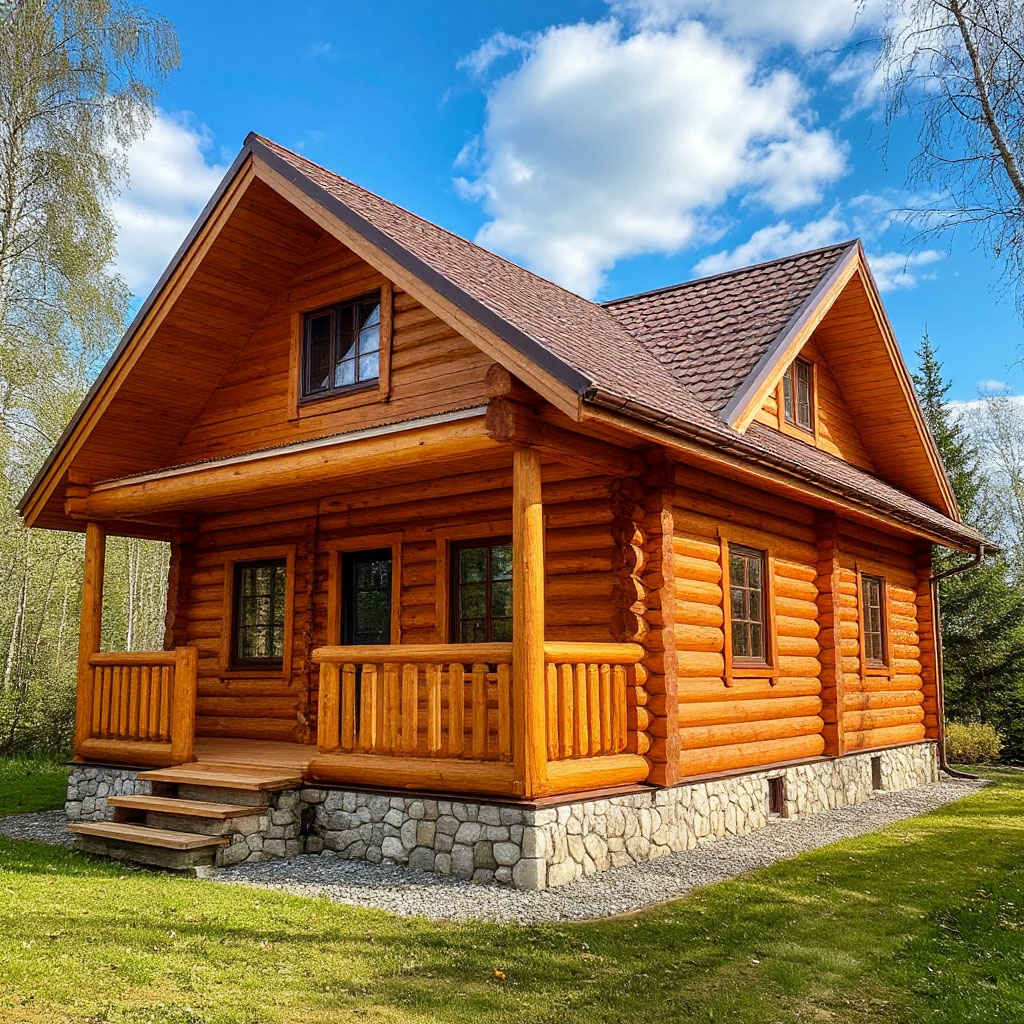
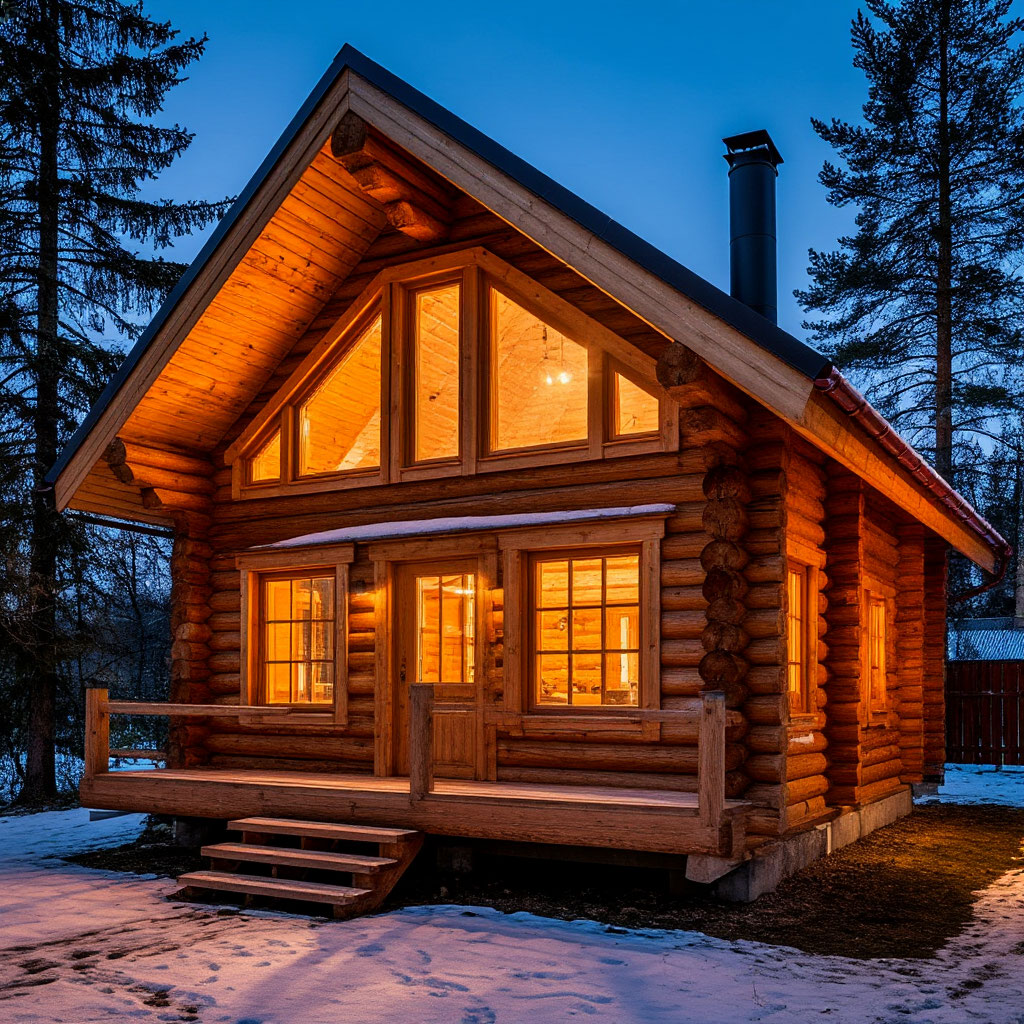
Do you own a log cabin and are those gaps between the logs starting to bother you? That’s where log cabin caulking comes in. Whether you’re trying to get rid of them for the first time or are updating an old caulk, choosing the best material is crucial. Your options are to go old-fashioned with a strong mortar or go with a flexible synthetic one. How do you keep drafts and bugs out of log cabins while improving energy efficiency? And don’t worry about using the right tools and caulking techniques. This DIY log cabin maintenance project is totally doable.
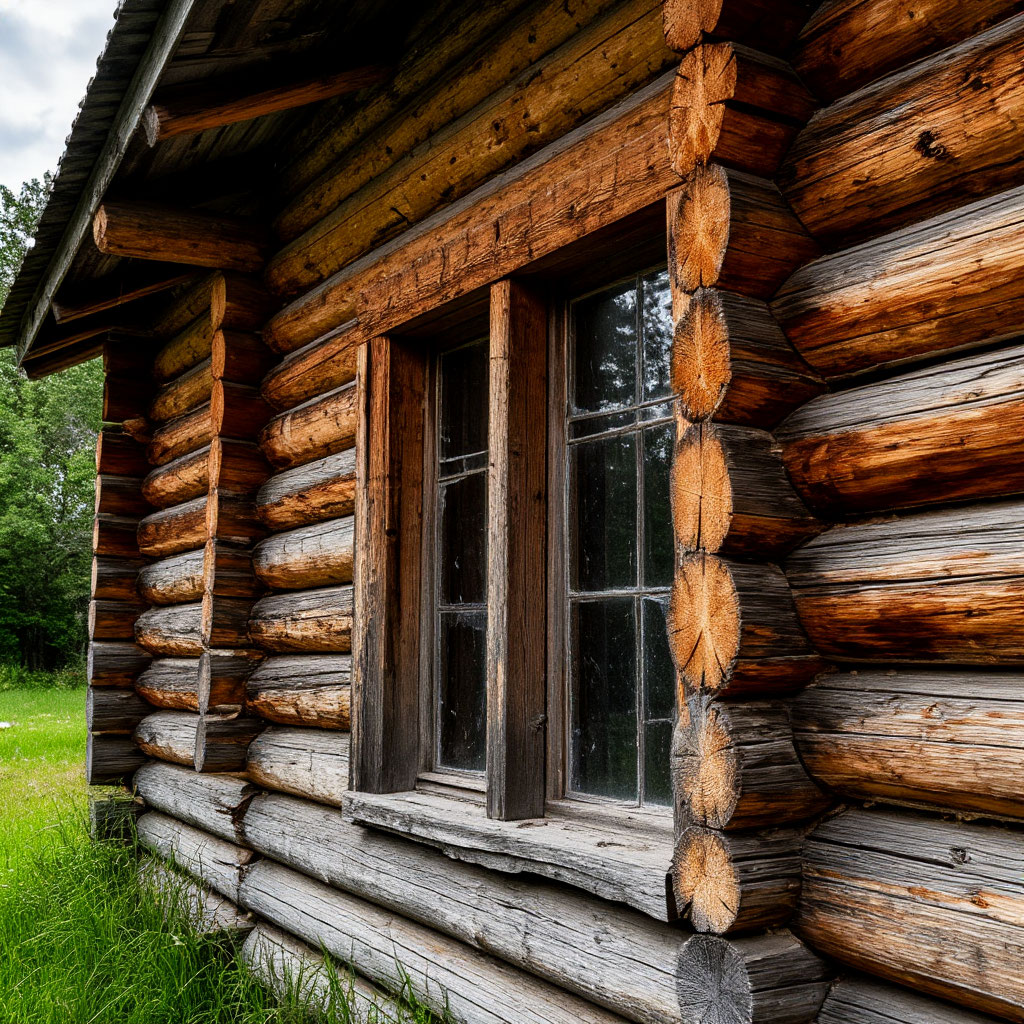
What is Chinking and Why It’s Essential
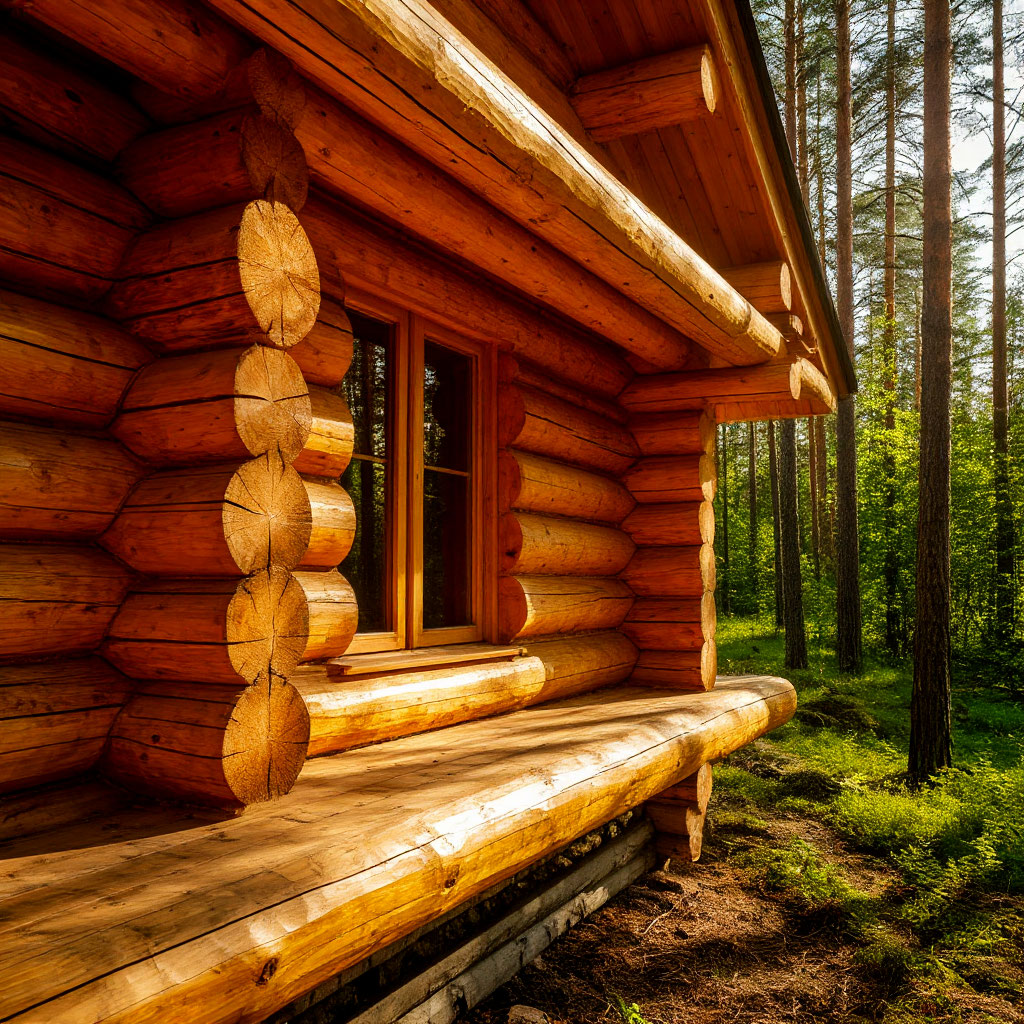
If you own a log cabin, those gaps between the logs aren’t just cosmetic – they’re potential energy drains and entry points for pests. Log cabin chinking solves these problems by sealing gaps while allowing natural wood movement. Whether you’re learning how to chink a log cabin or maintaining an older structure, understanding this process is crucial for protecting your investment.
The Critical Role of Chinking in Cabin Longevity
Proper log cabin chinking does much more than fill visible cracks. It’s your first line of defense in weatherproofing log cabins, preventing three major issues.
Energy Loss Prevention
Unsealed gaps create air leaks that can increase heating/cooling costs by 15-20%. Quality chinking tools and techniques maintain your cabin’s thermal efficiency year-round.
Structural Protection
As logs naturally settle and shift, flexible chinking accommodates movement while preventing moisture intrusion that leads to wood rot. This makes it essential for DIY log home maintenance.
Pest Deterrence
Even 1/4″ gaps provide access for insects and small rodents. The right best chinking material for cabins creates an impenetrable barrier against infestations.
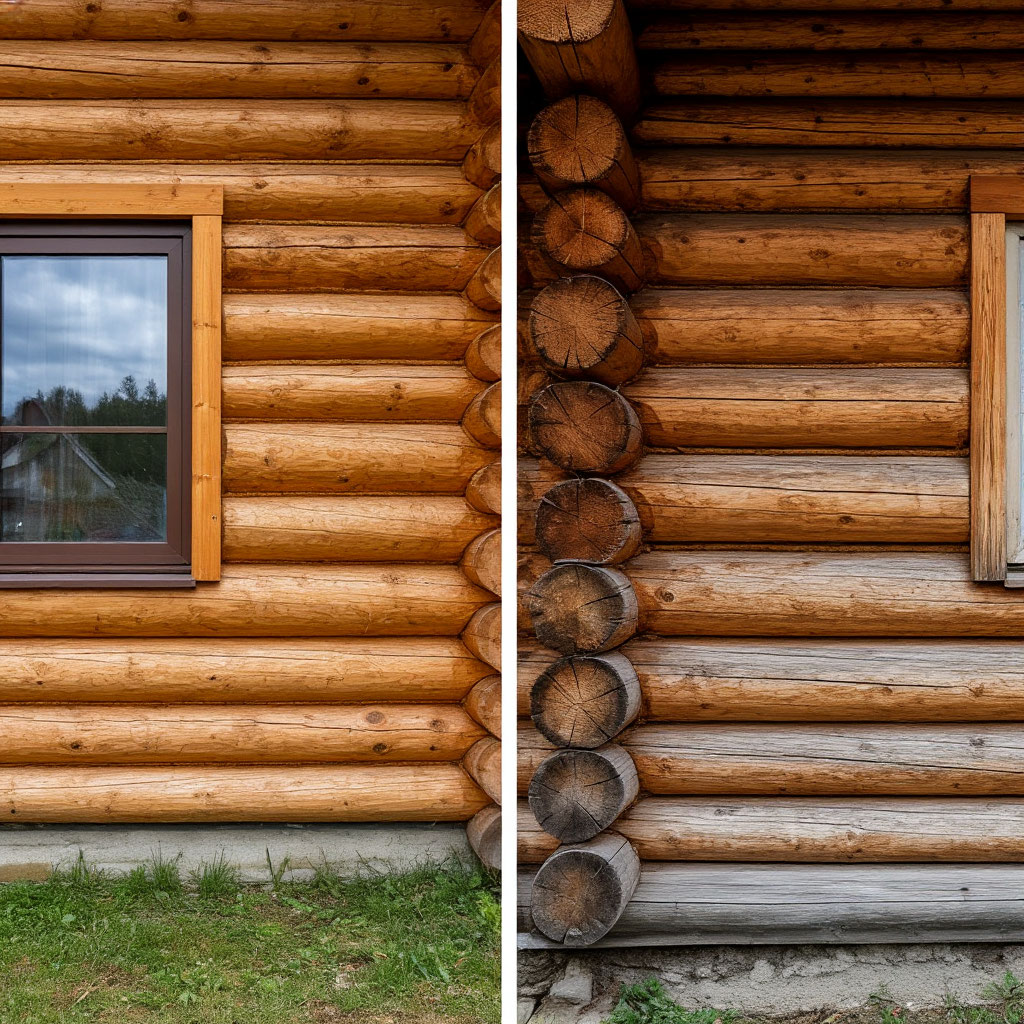
Traditional vs Modern: Choosing Your Chinking Approach
The synthetic vs mortar chinking debate comes down to your cabin’s age, location, and maintenance preferences.
Mortar Chinking (Traditional)
- Original method using lime, sand and clay mixtures.
- Authentic historical appearance for restored cabins.
- Requires skilled application and regular maintenance.
- Best for dry climates with minimal wood movement.
Synthetic Chinking (Modern)
- Advanced acrylic or polyurethane formulas.
- 10x more flexible than traditional mixes.
- Easier application with standard chinking tools and techniques.
- Superior performance in humid or variable climates.
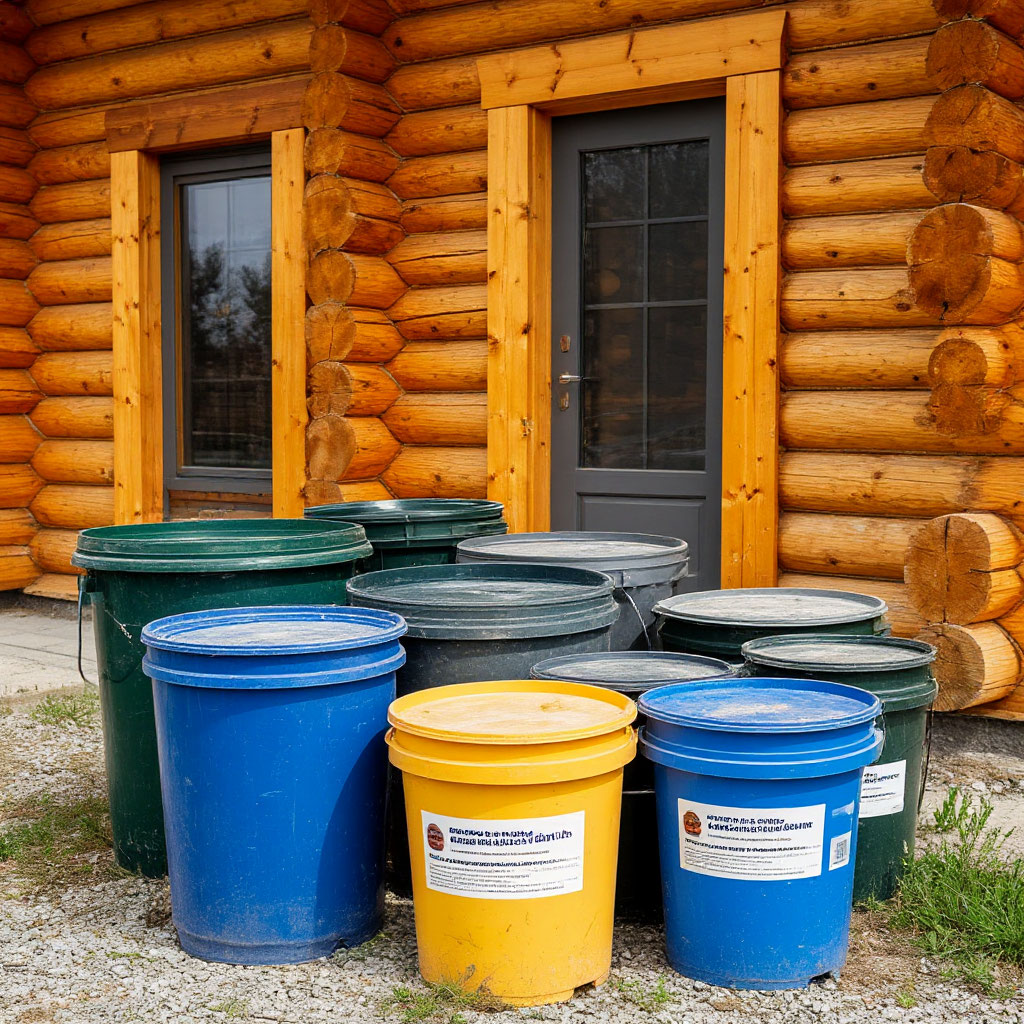
Essential Prep Work for Lasting Results
Before applying any log cabin chinking, proper surface preparation ensures maximum adhesion:
- Deep Cleaning – Remove all old chinking, dirt and debris using specialized log cleaners.
- Gap Assessment – Identify areas needing backer rod support before chinking.
- Moisture Check – Wood must be completely dry (below 18% moisture content).
- Priming – Some synthetic chinking requires primer for optimal bonding.

Why Professional Builders Never Skip Chinking
Even experienced log home contractors prioritize proper log cabin chinking because:
- Unsealed cabins lose structural integrity 30% faster.
- Moisture damage repairs often exceed chinking costs 5x over.
- Insurance companies may deny claims for preventable water damage.
- Energy audits consistently show chinking improves efficiency.
The best chinking material for cabins varies by project, but the need for quality sealing remains constant. Whether you choose time-tested mortar or modern synthetic compounds, proper weatherproofing log cabins through professional-grade chinking tools and techniques ensures your retreat stands the test of time.
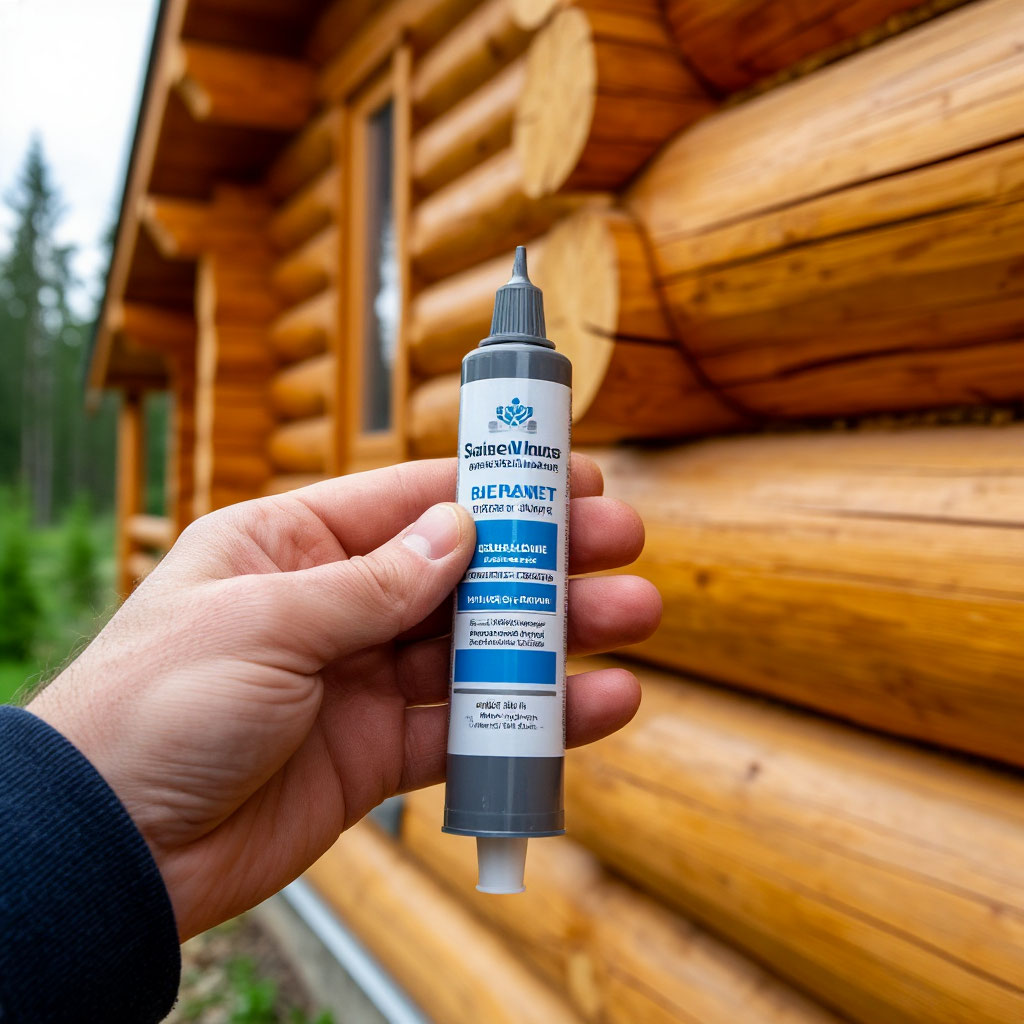
Choosing the Right Chinking Material
Finding the best cabin siding material requires careful consideration of your specific situation. What’s ideal for a century-old hand-hewn log structure may be completely unsuitable for a modern home. The ideal choice depends on factors such as:
- the local climate,
- the age of your cabin,
- how much time you’re willing to spend maintaining your DIY log home.
Climate Dictates Your Options
Your geographic location should be the starting point when comparing synthetic vs. mortar siding. Traditional mortar mixes thrive in arid desert climates where temperature fluctuations are minimal. But if you’re dealing with the extreme seasonal changes of the northern states, flexible synthetic compounds that can expand and contract become essential.
Coastal sites present special challenges because salt spray can break down some siding materials faster than others. In these environments, specialized marine-grade compounds offer greater durability. Humid regions require cracks that resist mold and mildew growth without constant maintenance.
Understanding the Properties of Materials
Traditional mortar mixes are an original approach to sealing cracks in log cabins, combining lime, sand and other natural ingredients. Despite their unrivaled authenticity and impressive lifespan when properly maintained, these mixes require precise preparation and regular inspections. This allows developing cracks to be detected before they become problems. Their rigid nature makes them unsuitable for areas with significant seismic activity or extreme temperature changes.
Modern synthetic mortar mixes have changed the way cracks in log cabins are sealed. These acrylic or polyurethane-based products offer exceptional flexibility, capable of stretching to several times their original size to accommodate log movement. Available in pre-mixed tubes and a variety of wood-matching colors, they simplify the application process and also include UV inhibitors to prevent sun damage.
For environmentally conscious homeowners, soy-based alternatives provide sustainable performance. Extreme climates may require special formulas designed to work in temperatures ranging from -40°F to 140°F. Historic restoration projects benefit from modern caulking solutions that replicate the traditional look while providing modern durability.
Estimating Real Costs
While mixing your own grout may seem economical at first, the hidden costs often outweigh the savings. Over time, these add up to:
- Specialized tools needed for proper application.
- Potential rework due to poor mixes.
- Ongoing maintenance work.
Synthetic grout has a higher initial price, but is often more cost-effective in the long run. Many premium products come with a multi-year warranty when applied correctly with the right tools and grouting techniques, reducing future maintenance needs and costs.
Achieving Perfect Visual Harmony
Color matching deserves special attention when choosing log home weatherproofing materials. Online color representations often differ significantly from the actual results. Obtaining physical samples and testing them on real logs prevents disappointing inconsistencies. Experienced builders recommend choosing grout colors that are slightly darker than the current shade of your logs. Since wood naturally weathers and lightens over time, this consideration helps maintain visual balance. Many manufacturers provide small sample lots so you can see how colors look in different lights before making a large purchase.
Strategies for Smart Material Selection
While it may be tempting to use inexpensive, all-purpose caulks for small gaps, this approach usually leads to premature failure. Products designed for interior use are not strong enough for exterior use, and standard construction caulks do not have the flexibility to properly fill the gaps in a log cabin.
Savings can be found by buying in bulk for large projects and using backer rods to fill deep gaps before applying finish coats. Renting specialized application tools rather than buying them outright makes sense for one-off projects.
Trusted Sources of Products
After extensive field testing on real log structures, several manufacturers consistently deliver quality results. Perma-Chink excels in overall performance in a variety of conditions, while Sashco excels in extreme weather conditions. Those looking for a traditional aesthetic appreciate Weatherall’s authentic finishes, while DIY enthusiasts swear by Log Jam for its ease of application.
Common hardware products sold for log homes often lack the flexibility needed to last. Investing in quality products specifically designed for log home gap filling provides the best long-term results.

Know When to Hire a Professional
In some situations, it’s better to call in the experts than to attempt log home maintenance yourself. Professional help is needed when working on:
- Historic properties with preservation requirements, structures.
- Homes that show significant shrinkage with irregular gaps.
- Previous unsuccessful attempts to level the gaps.
Many manufacturers maintain networks of certified installers who understand the specific application requirements of their products, providing valuable peace of mind for important projects.
Traditional Mortar Chinking Method
There’s something timeless about using traditional log caulk that modern materials just can’t replicate. That rugged, authentic look takes you back to when pioneers first settled the land. But make no mistake — this isn’t some simple “mix and go” project. Proper log caulking takes patience, the right materials, and some old-school techniques.
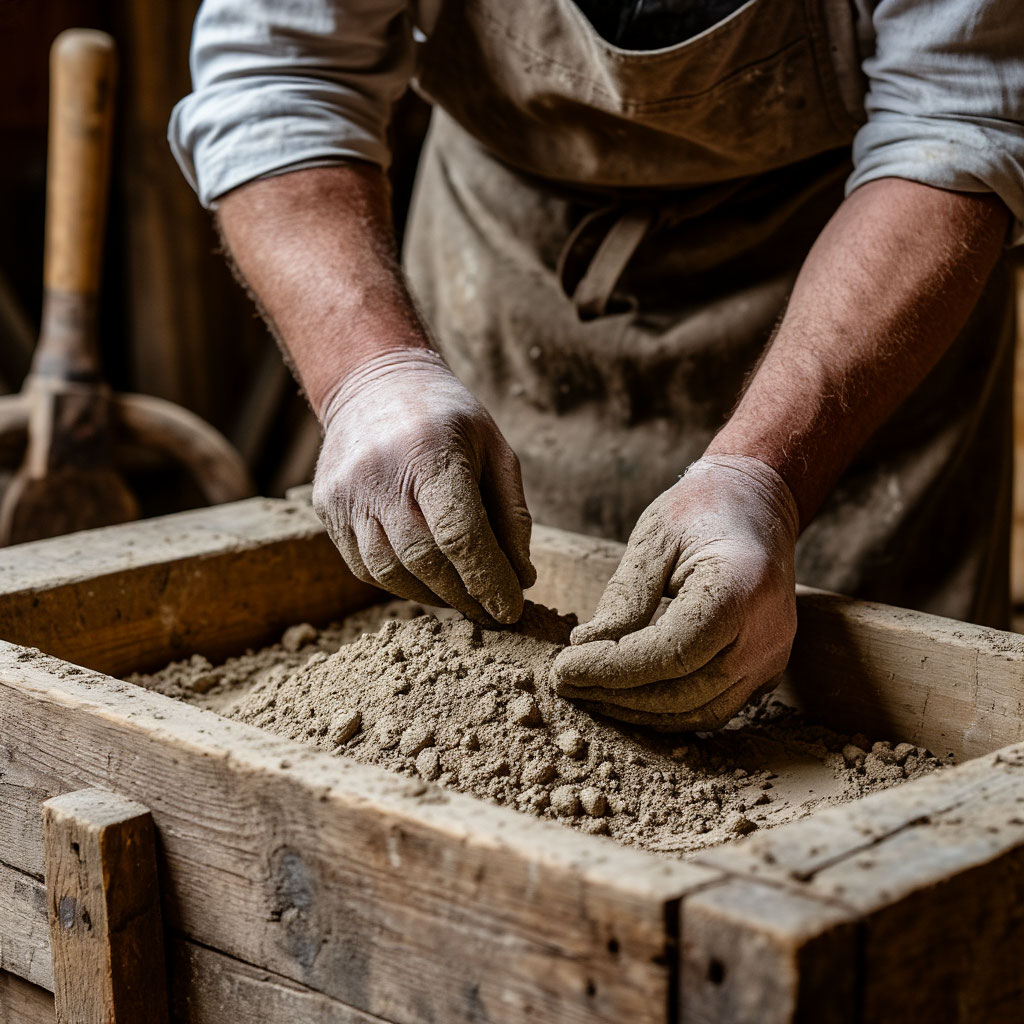
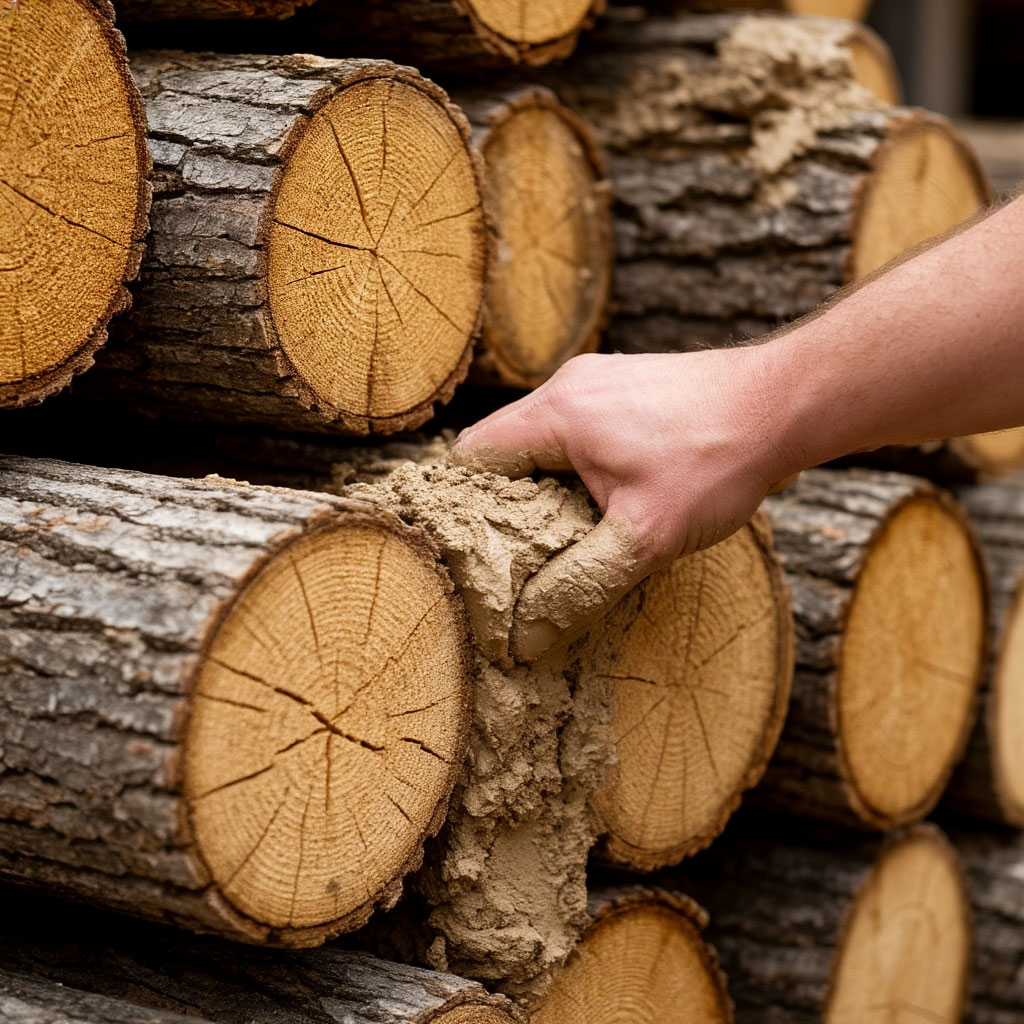
Mixing the Perfect Mortar Mix
Getting the right mortar mix is critical when caulking logs the traditional way. Most historic recipes call for:
- 6 parts sharp sand (coarse, angular).
- 1 part slaked lime.
- 1 part Portland cement.
- Just enough water to make it workable.
Some old-timers still swear by adding animal hair or chopped straw for reinforcement. The mixture should hold its shape when compressed, but still be flexible enough to fill gaps. Too wet and it will settle; too dry and it won’t bond properly.
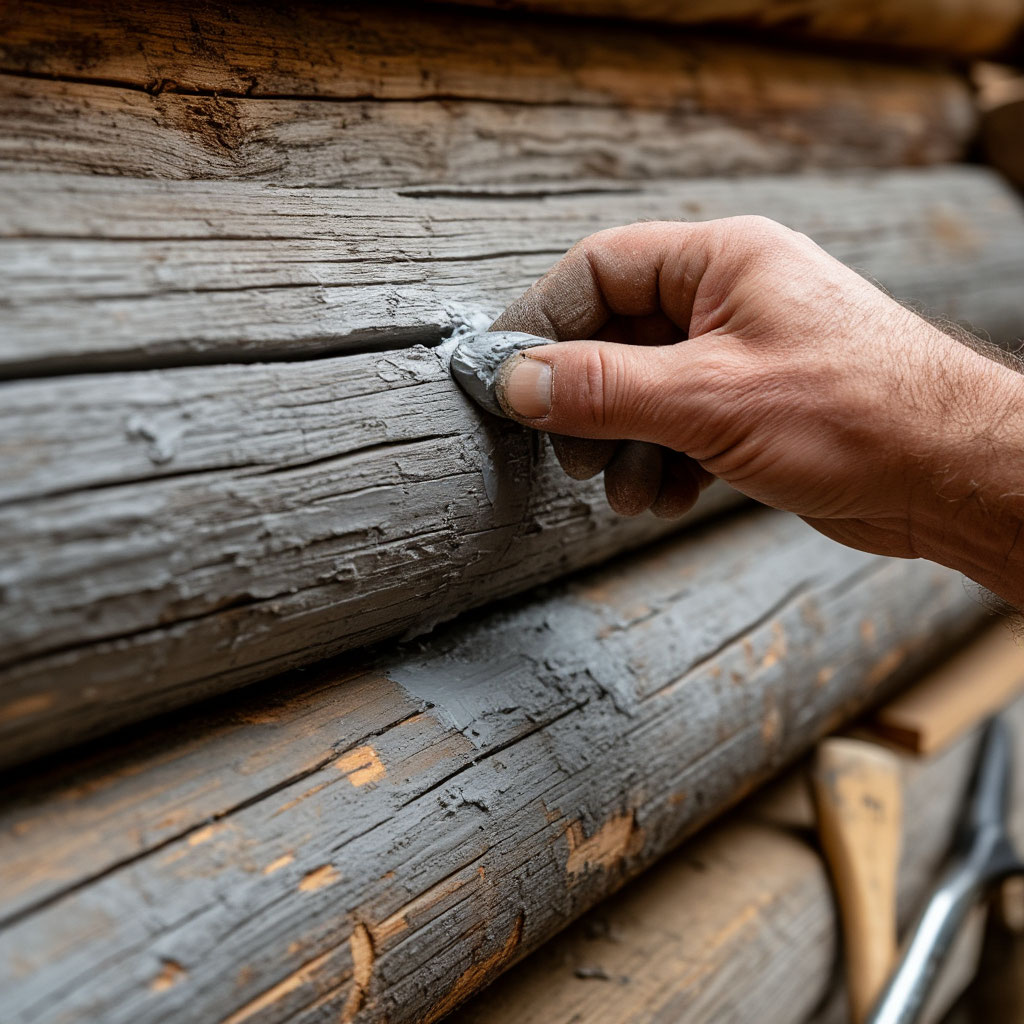
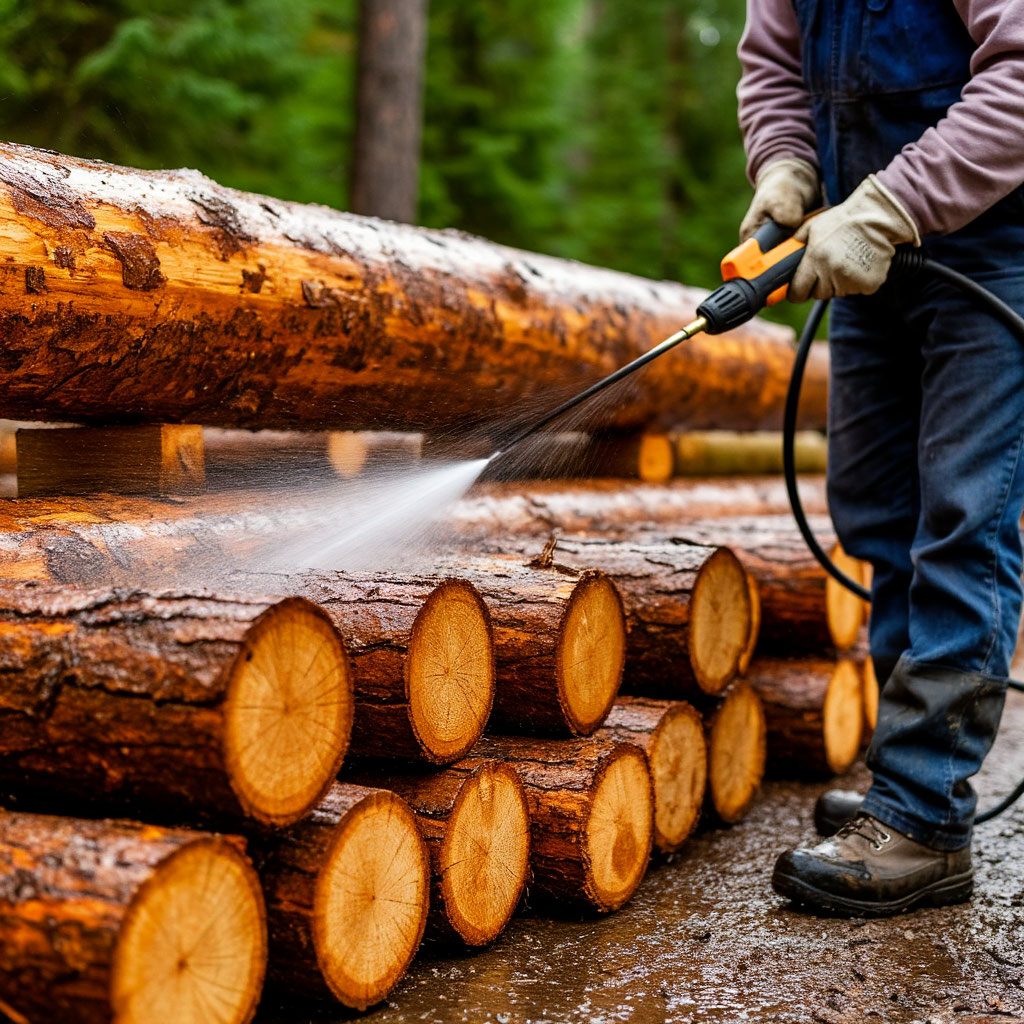
Preparing the Surface Like the Pros
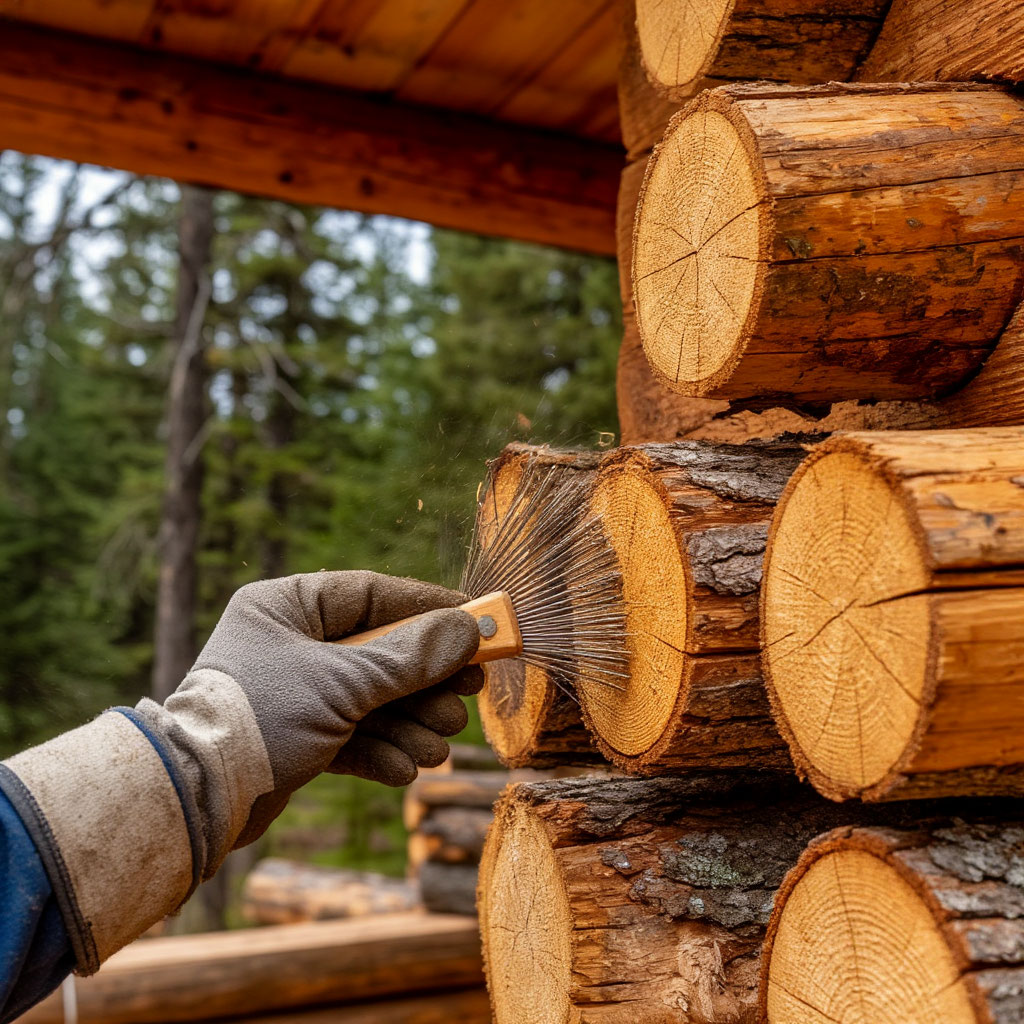
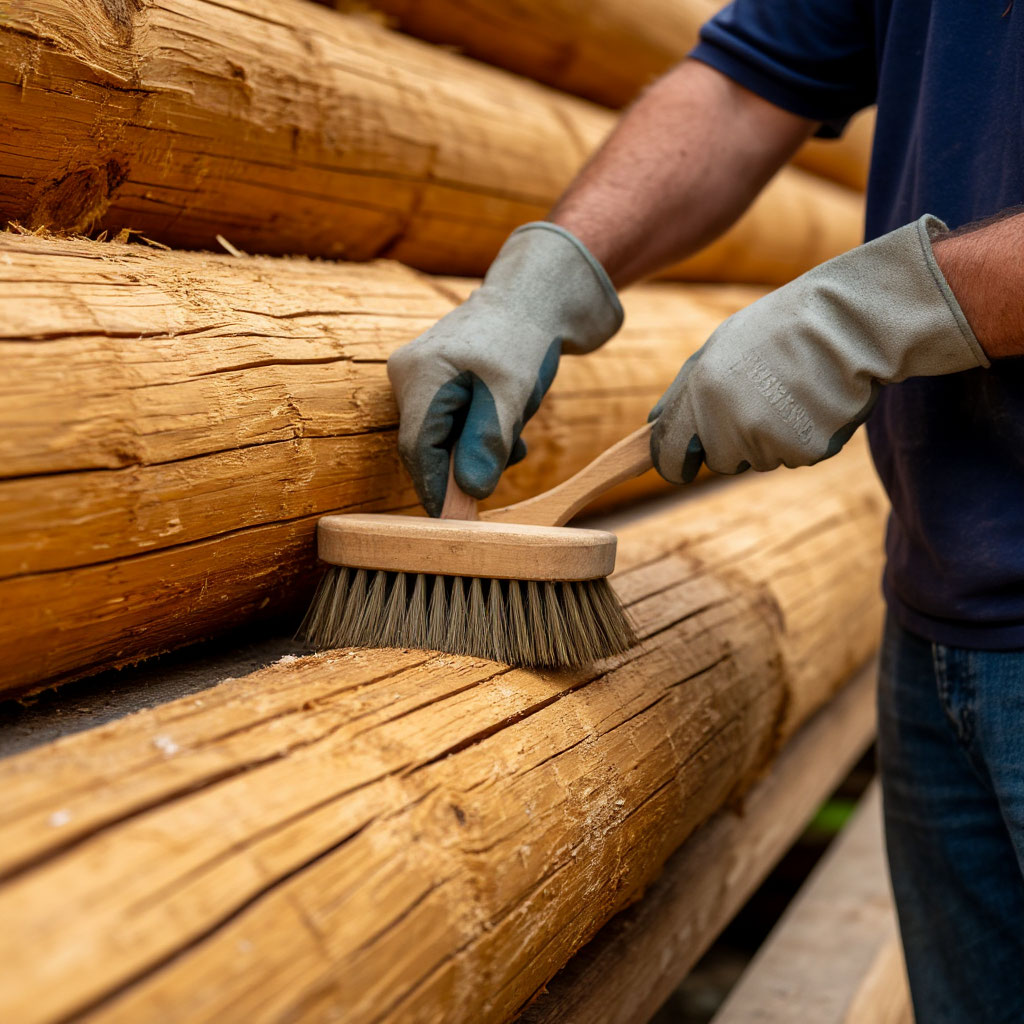
Before the mortar ever touches your logs, proper preparation will ensure that your DIY log home maintenance will stand the test of time. Start by removing all loose material and cleaning the surfaces with a wire brush. Then, lightly dampen the wood—not soaking, just to keep the logs from absorbing the moisture from your fresh mortar too quickly.
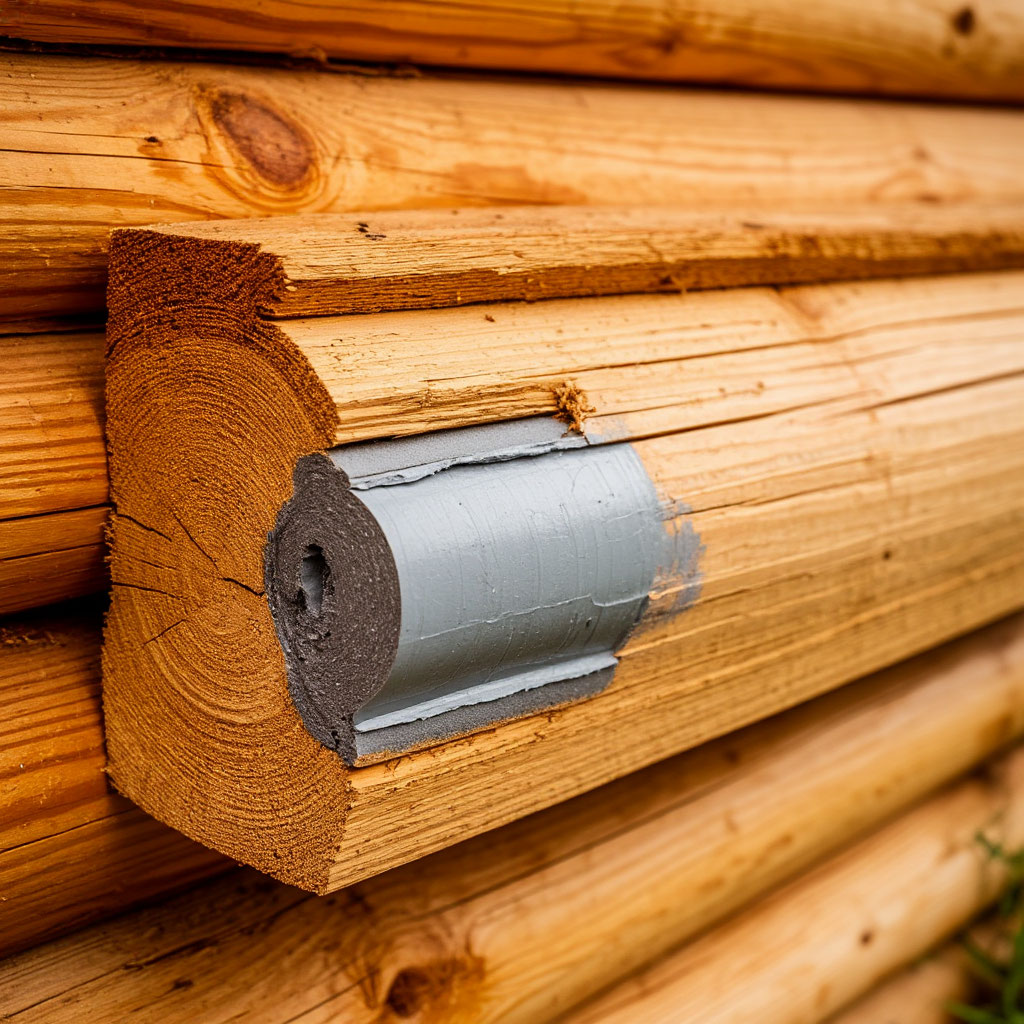
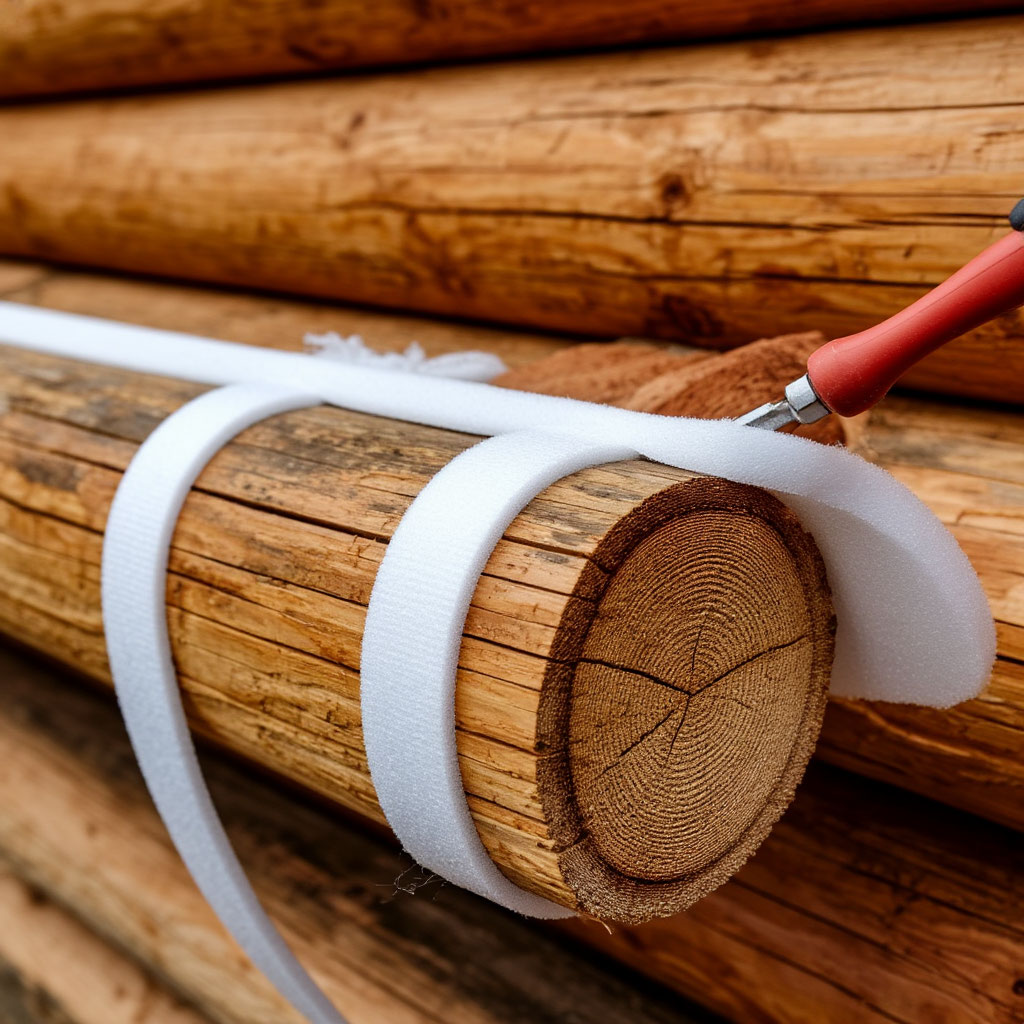
For larger gaps (more than 1 inch wide), install a backer rod first. This foam rope gives the mortar something to cling to and prevents excessive shrinkage cracking. Some traditionalists use cedar shims instead for an even more authentic approach.
Application Techniques That Will Last for Generations
Applying traditional log home caulk is part art, part science. Use a narrow trowel to fill the cracks with mortar, working from the bottom up. Apply it in layers no thicker than 1/2 inch at a time, allowing each layer to cure before adding the next.
The real craftsmanship comes in the finish. Many historic homes have distinctive “V” or concave profiles that effectively shed water. Achieve this by running a round tool over the surface while the mortar is still workable but has lost its shine.
Curing for Maximum Durability
Here’s where many DIY log home maintenance projects fail—rushing the curing process. Traditional mortar needs to dry slowly to reach its full strength. Keep it moist by misting lightly for 3 to 5 days, especially in hot weather. Cover with burlap if direct sun can dry it out too quickly.
It takes about 28 days to fully cure, although you will notice it has hardened considerably during the first week. Do not touch or disturb it during this critical period.
Common Mistakes to Avoid
Even experienced builders sometimes confuse traditional synthetic grout with mortar. Beware of:
- Adding too much Portland cement (makes it brittle).
- Working in direct sunlight (dries too quickly).
- Applying in freezing temperatures (impairs curing).
- Skipping lime (reduces flexibility).
When Mortar Makes Sense
Despite modern alternatives, traditional mortar remains the best grouting material for cabins in certain situations:
- Historic restorations where authenticity is important.
- Dry climates with minimal wood movement.
- Owners who want regular inspections.
- Cabins with very large, irregular gaps.
Long-Term Maintenance
Unlike modern log cabin weatherstripping products, traditional mortar requires annual attention. Check for hairline cracks every spring and redo as needed. A light coat of lime every few years helps protect the surface and maintain a classic look.
With proper care, a well-done mortar job can outlast most synthetic alternatives. It’s no wonder that some century-old log cabins still have their original mortar joints—if done right, they’ll last forever.
Modern Synthetic Chinking (Easier Alternative)
These days, most people caulking their log home are choosing modern synthetic compounds — and for good reason. While traditional mortar has its charm, synthetic mortar offers flexibility and ease of application that are hard to match. If you’re looking for a DIY log home maintenance solution that won’t leave you mixing buckets of mortar or worrying about hairline cracks, this may be your best bet.
Why Synthetic Mortar Wins for Most Homes
The synthetic vs. mortar debate often comes down to practicality. Modern acrylic and polyurethane-based formulas stretch up to 500% of their original size, moving with the logs as they expand and contract with seasonal changes. Unlike rigid mortar, which can crack as the logs shift, these flexible alternatives maintain their seal through years of wood movement.
Another benefit is ease of application. Most synthetic caulking solutions come ready to use in convenient cartridges that fit standard caulking guns — no messy mixing required. You’ll find this a gentler method if you’re still learning how to properly caulk a log home.
Choosing a Synthetic Formula
Not all synthetic caulking materials work the same. When choosing the best caulking material for homes, consider the following options:
- Elastomeric acrylics: ideal for most climates, with good UV resistance.
- Polyurethane blends: excellent flexibility under extreme temperature changes.
- Hybrid formulas: combine the strength of acrylic with the elasticity of polyurethane.
- Specialty types: mildew resistant for damp areas, highly flexible for new homes.
Premium brands like Perma-Chink and Sashco offer products specifically designed to weatherproof log homes, with some formulas boasting a 35-year lifespan when applied correctly.
Easy Surface Preparation
While synthetic gap sealers are gentler than mortar, proper preparation still matters. Start by removing any loose material and thoroughly cleaning the logs—a pressure washer works great for this. Allow the wood to dry completely before applying anything.
For gaps wider than your thumb, insert a backer rod first. This foam trowel reduces the amount of caulking needed and creates a suitable surface for adhesion. Unlike mortar, you typically don’t need to wet the surface before applying synthetic sealers.
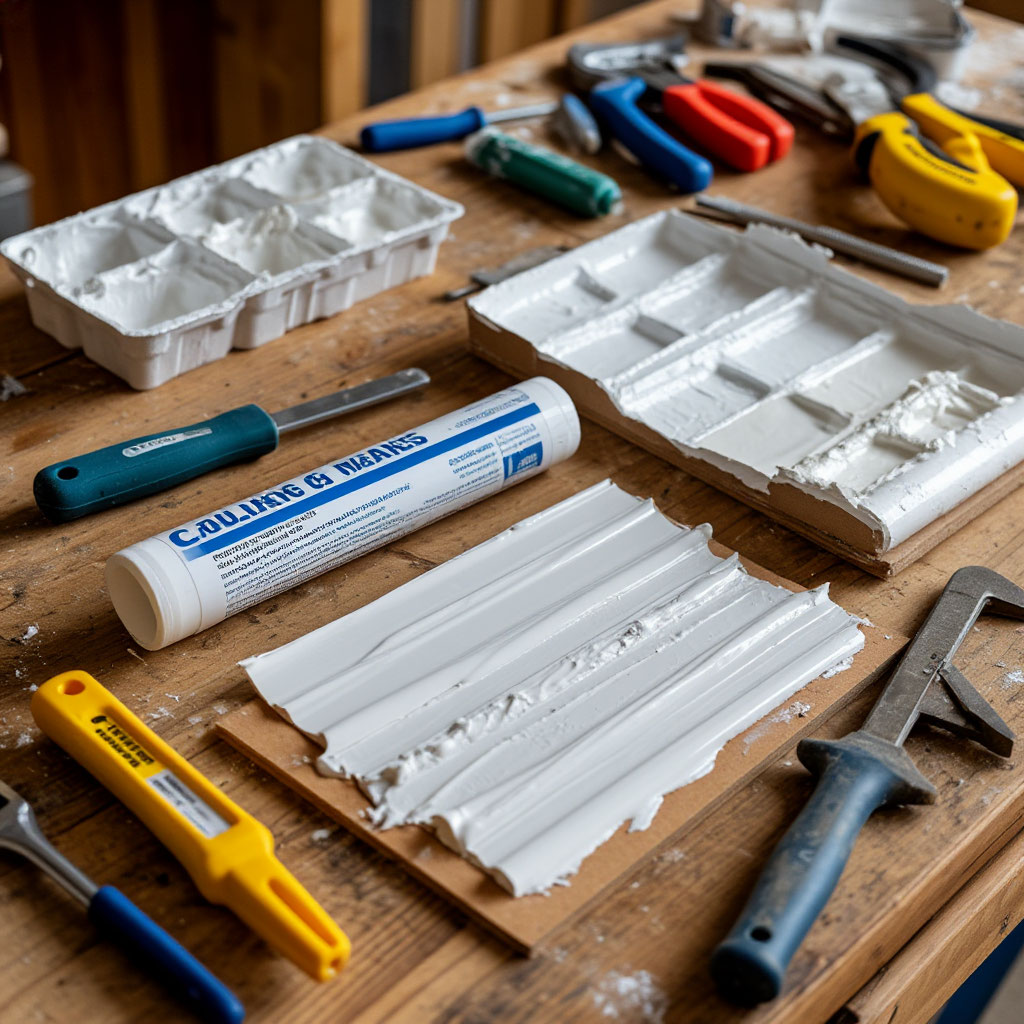
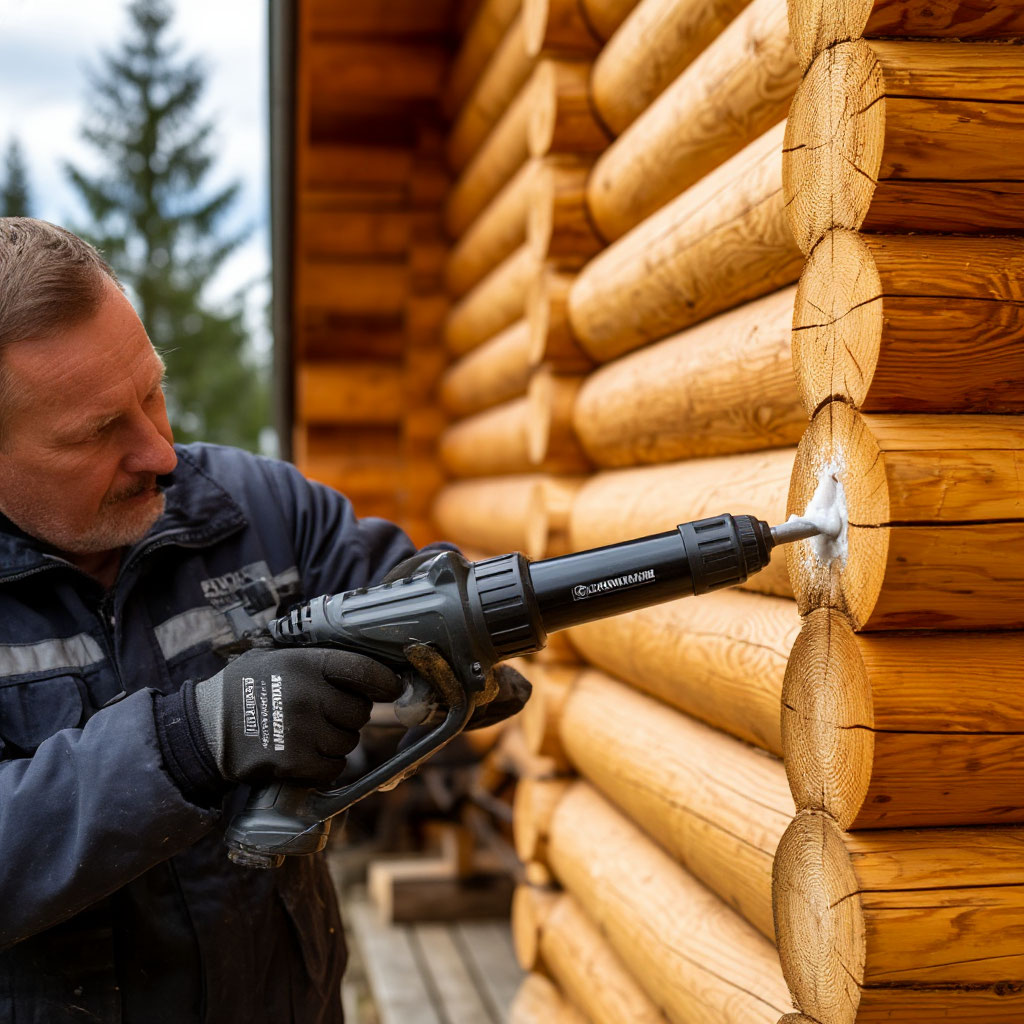
Application Tricks the Pros Use
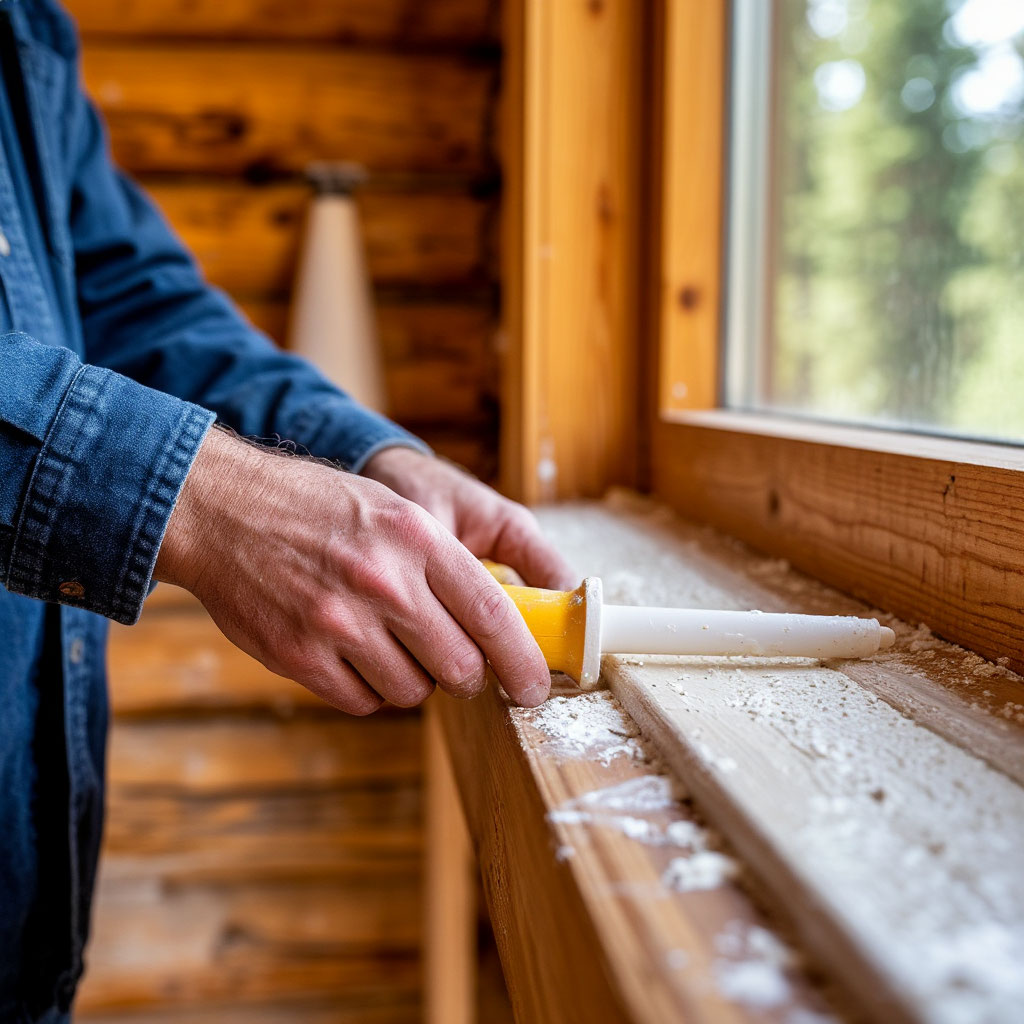
Mastering the tools and techniques for caulking synthetics takes some practice, but it’s not difficult. Load a cartridge into a heavy-duty caulk gun — one with a smooth trigger action makes the job easy. Cut the nozzle at a 45-degree angle to match the width of the gap.
Apply in even drops, slightly overfilling the gap. Smooth immediately with a wet trowel or caulking tool, keeping a bucket of water nearby to rinse the tool frequently. The goal is a slightly concave surface that effectively sheds water.
Unlike mortar, you don’t build up synthetic caulk in layers — one proper application is enough. Work in manageable sections, typically 3 to 4 feet at a time, before moving on to the next section.
Differences in Drying and Curing
This is where synthetic seam really shines in DIY log home maintenance. While mortar requires days of careful curing, most acrylic formulas film up in about an hour and are fully cured within 24 to 48 hours. Polyurethane types may take a little longer.
You’ll need to avoid rain for a few hours after application, but after that, synthetic seam is surprisingly low maintenance during the curing process. No fogging, no coating – just let it do its thing.
When to Choose Synthetic Over Traditional
Modern seam really proves its worth in certain situations:
- New homes that are still settling.
- Humid climates where mold resistance is important.
- Earthquake-prone areas where maximum flexibility is needed.
- DIYers looking to simplify the application process.
- Cabins in extreme temperature zones.
Synthetic may not be the best choice for historic restorations where authenticity is paramount, or in situations where you specifically want a traditional, rough-hewn look.
Long-Term Performance Expectations
When applied correctly, quality synthetic plaster will typically last 20 to 30 years before needing attention. Unlike mortar, which requires annual inspections, modern formulas can go a decade between inspections.
When maintenance is required, it’s usually just spot repairs rather than a full re-plaster. Most brands offer color-coded repair kits for just this purpose, making log cabin plaster maintenance surprisingly easy.
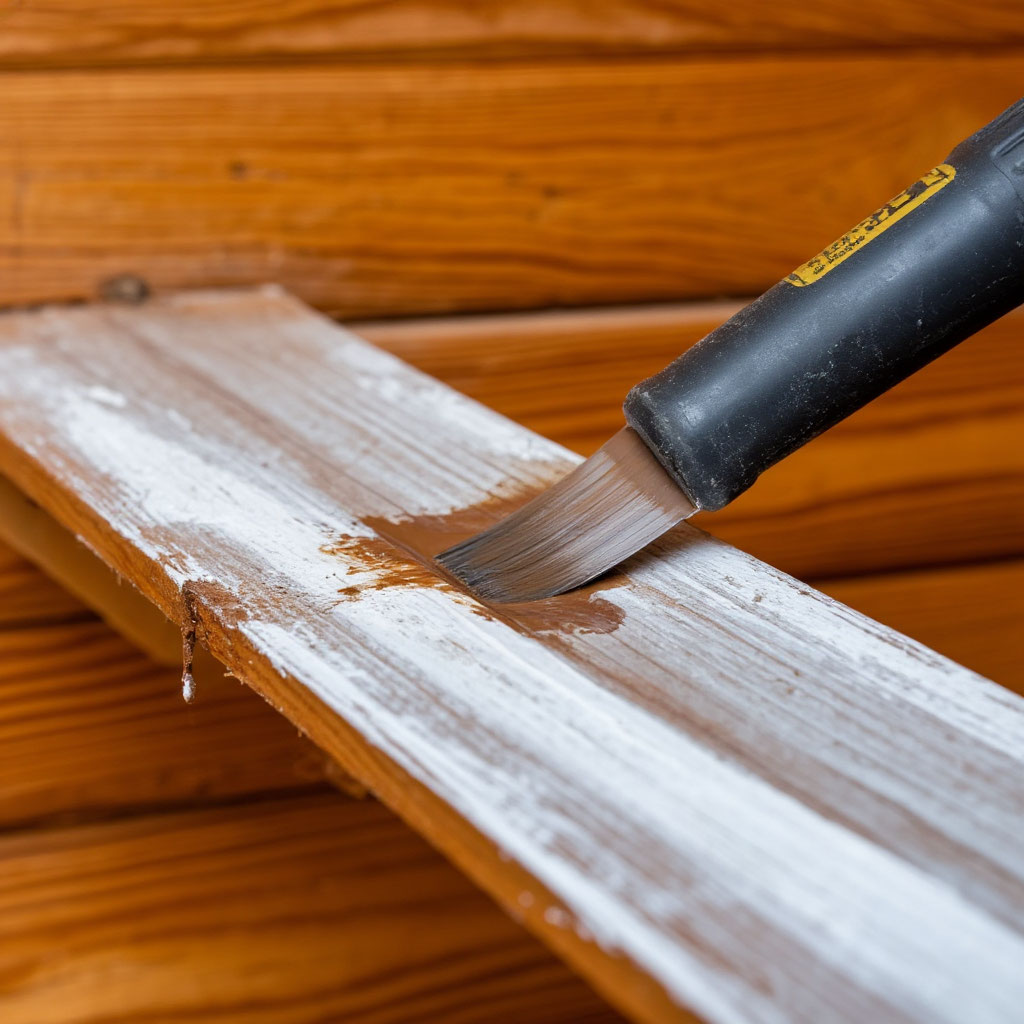
Step-by-Step Application Guide
Properly applying log home caulk can mean the difference between a drafty home and a weather-proof shelter. Whether you’re using traditional mortar or a modern synthetic one, the application process follows similar principles with a few key variations. Here’s how the pros handle how to caulk a log home for long-lasting results.
Preparing for the Job
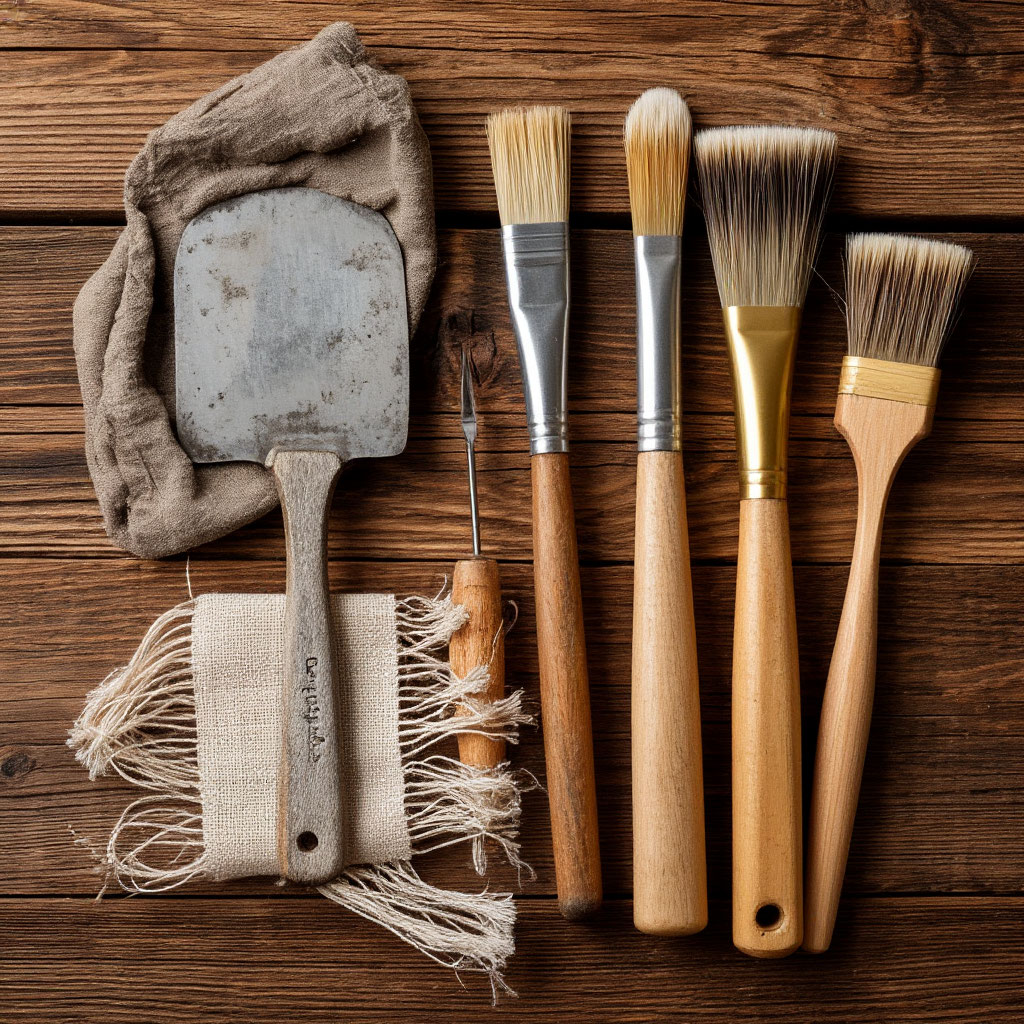
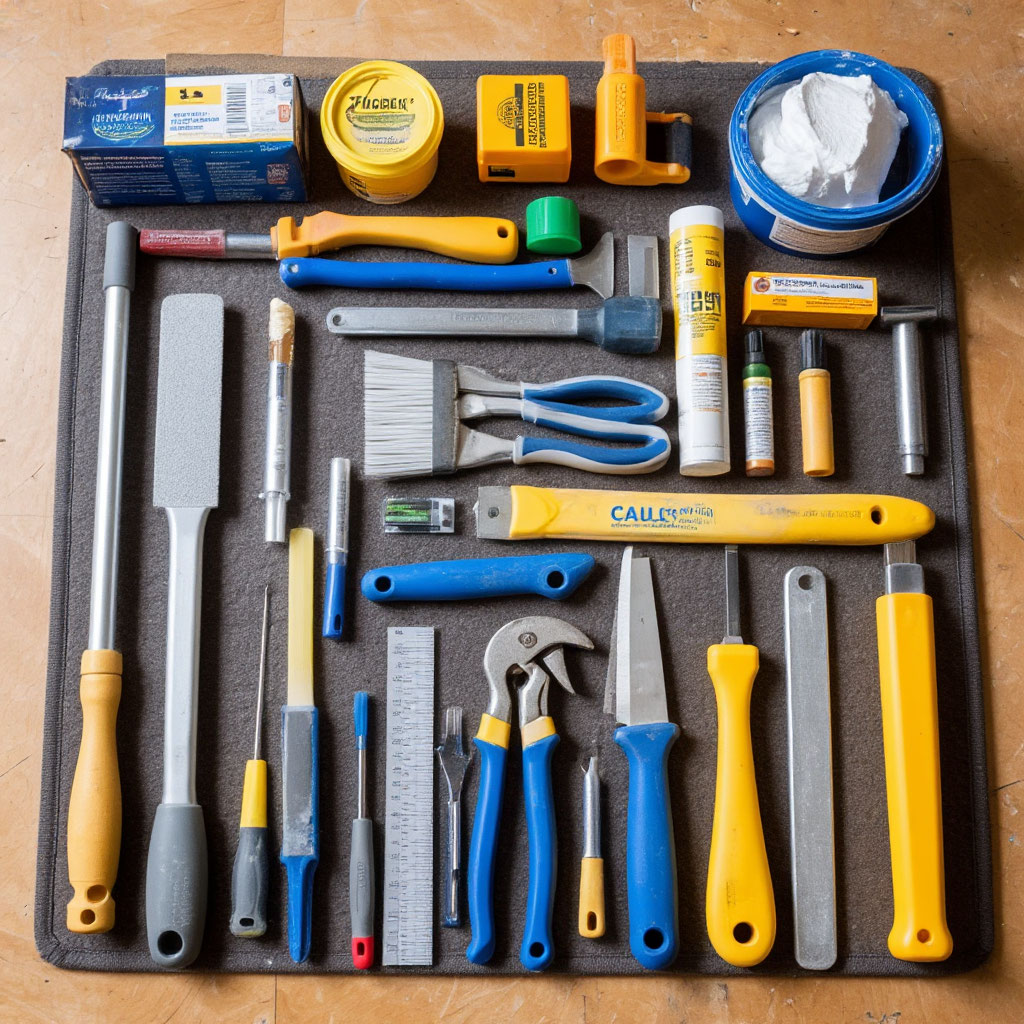
Before you squeeze out the first drop of caulk, gather the right caulking tools and techniques for the material you’ve chosen. For synthetic jobs, you’ll need a heavy-duty caulk gun with a smooth trigger—cheap ones will tire your hand out quickly. Mortar jobs require special trowels of varying widths and a mixing paddle for your drill.
Don’t skimp on safety gear, either. Gloves will protect your hands from abrasion, and knee pads will protect your knuckles during long periods of work along the lower logs. A sturdy ladder or scaffolding will provide stability when reaching higher areas. And always keep a bucket of clean water and rags on hand for quick cleanup.
Surface Preparation Keys
Proper preparation is the difference between temporary fixes and permanent solutions when it comes to DIY log home maintenance. Start by removing all loose material—old caulk, dirt, or debris—using a wire brush, scraper, or pressure washer. Pay special attention to areas where previous caulking failed, as these areas often require additional cleaning.
For gaps larger than a half-inch, insert a shim rod before applying your best log home caulking material. This foam rope filler creates a stable base and prevents overuse of material. Cut the pieces slightly longer than the gap and press them firmly, leaving about a quarter-inch of depth for the caulking itself.
Mixing and Loading Materials
Traditional mortar requires thorough mixing to achieve the right consistency for weatherproofing log homes. Mix small batches that you can use within about 30 minutes, as the mortar begins to set quickly. The ideal mixture should hold its shape when formed into a ball, but still be flexible enough to fill cracks.
Synthetic grout makes this step much easier – simply load the cartridge into the gun and clamp the nozzle tip to the desired width. Some brands benefit from a quick stir with a stick if they have separated in storage, but most are ready to use straight from the tube.
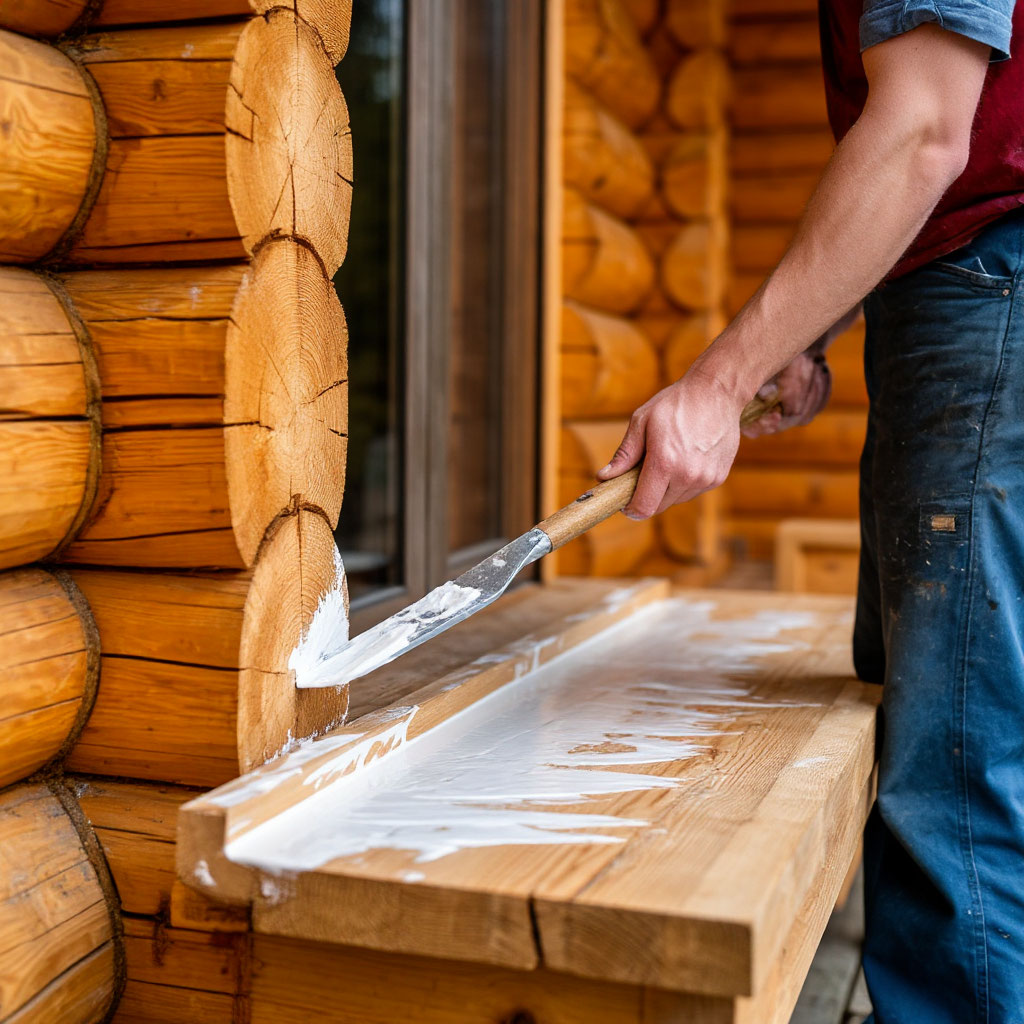
Application Methods That Last
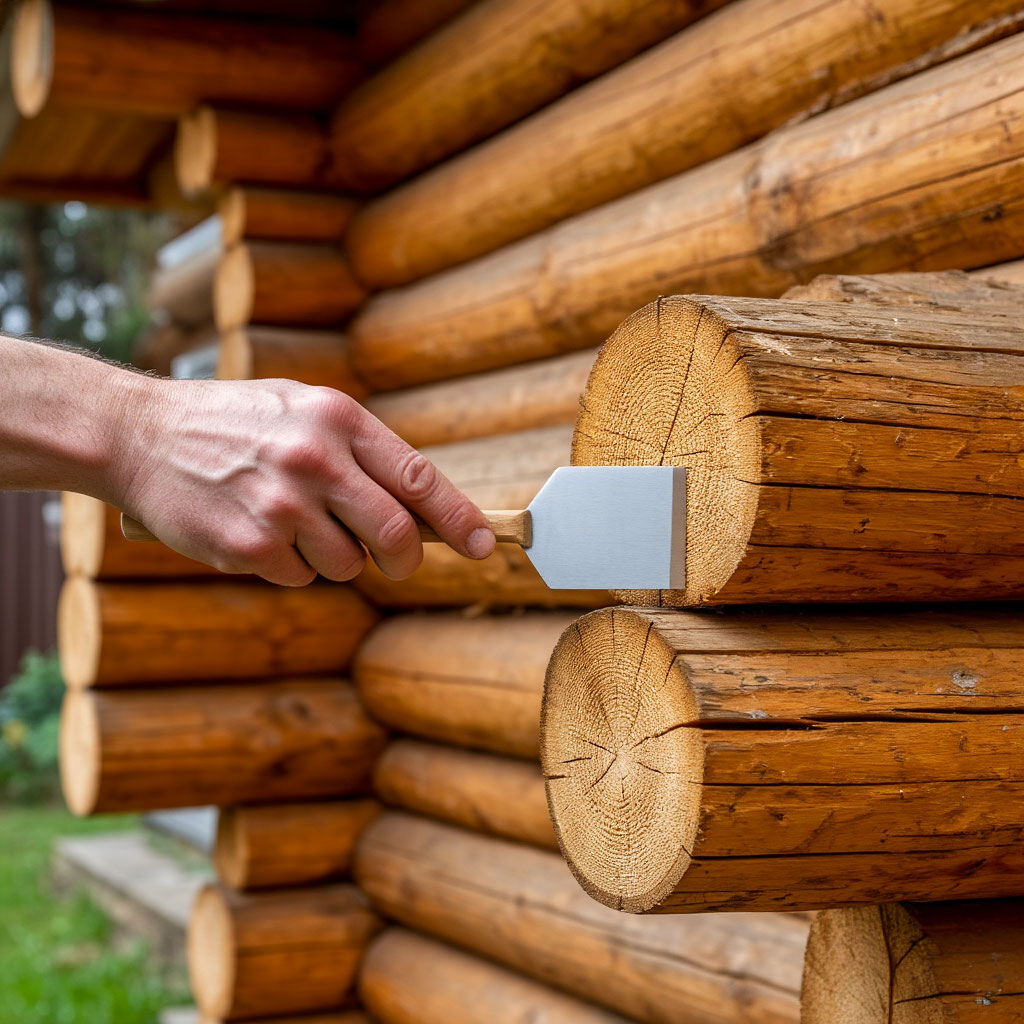
Working from the bottom up prevents drips and ensures proper overlap of coats. To apply the grout, use a trowel to press the material deep into the cracks, then apply layers no thicker than your thumb. Allow each layer to set slightly before adding the next, until you have slightly overfilled the crack.
When applying synthetic log grout, maintain constant pressure on the trigger of the caulk gun to apply an even layer. Immediately work the material with a wet trowel or special grouting tool, creating a slightly concave surface that repels water. Keep the tool clean by dipping it in water frequently – this prevents sticking and ensures a smooth finish.
Finishing Touches for a Professional Result
The final look depends on the approach you take with synthetic or mortar joint compound. Mortar benefits from texturing while it is still workable—some builders use stiff brushes or special rollers to match the historic look. Synthetic joint compound usually looks best when it is smoothly tooled with small indentations around the edges.
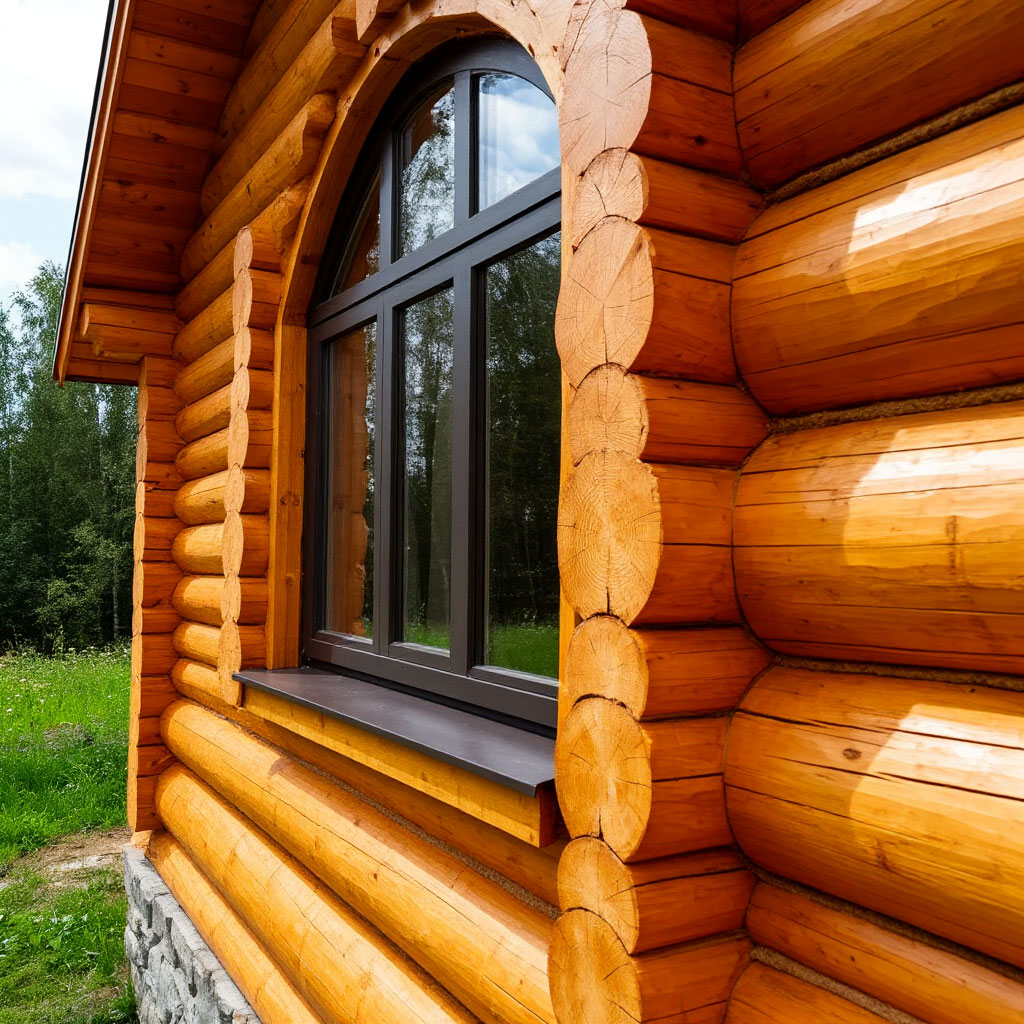
Pay special attention to the corners and ends of logs, where moisture penetration often begins. These areas may require additional material or a special shape to ensure complete protection. Many professionals trim these joints slightly to create positive drainage away from vulnerable areas.
Curing and Protection
Newly applied joint compound requires proper curing conditions. The compound needs to dry slowly—spray it lightly several times a day for about a week and protect it from direct sunlight with burlap if necessary. Synthetic compounds typically require 24 to 48 hours without rain to cure properly.
Avoid touching or testing the material during this critical period. Even surfaces that appear dry may still be curing underneath. Full strength is achieved within a few weeks, although most cracks will be weather-resistant within a few days.
Common Mistakes to Avoid
Even experienced DIYers occasionally stumble during log home crack projects. Applying materials in direct sunlight will cause premature drying and poor adhesion. Working in temperatures below 50°F (10°C) will prevent most products from curing properly.
Other pitfalls include:
- overuse of synthetic cracking tools (which can cause blisters);
- using the wrong size backing rod;
- not cleaning surfaces properly.
Perhaps the most common is underestimating the time required – rushing results in sloppy work that fails prematurely.
Keeping Your Log Home in Perfect Condition
That fresh log home sealing job may look perfect now, but like everything else, it requires periodic attention. Whether you used traditional mortar or a modern synthetic one, a little preventative maintenance will prevent big problems down the road. Here’s how to keep your home’s seal protected for decades to come.
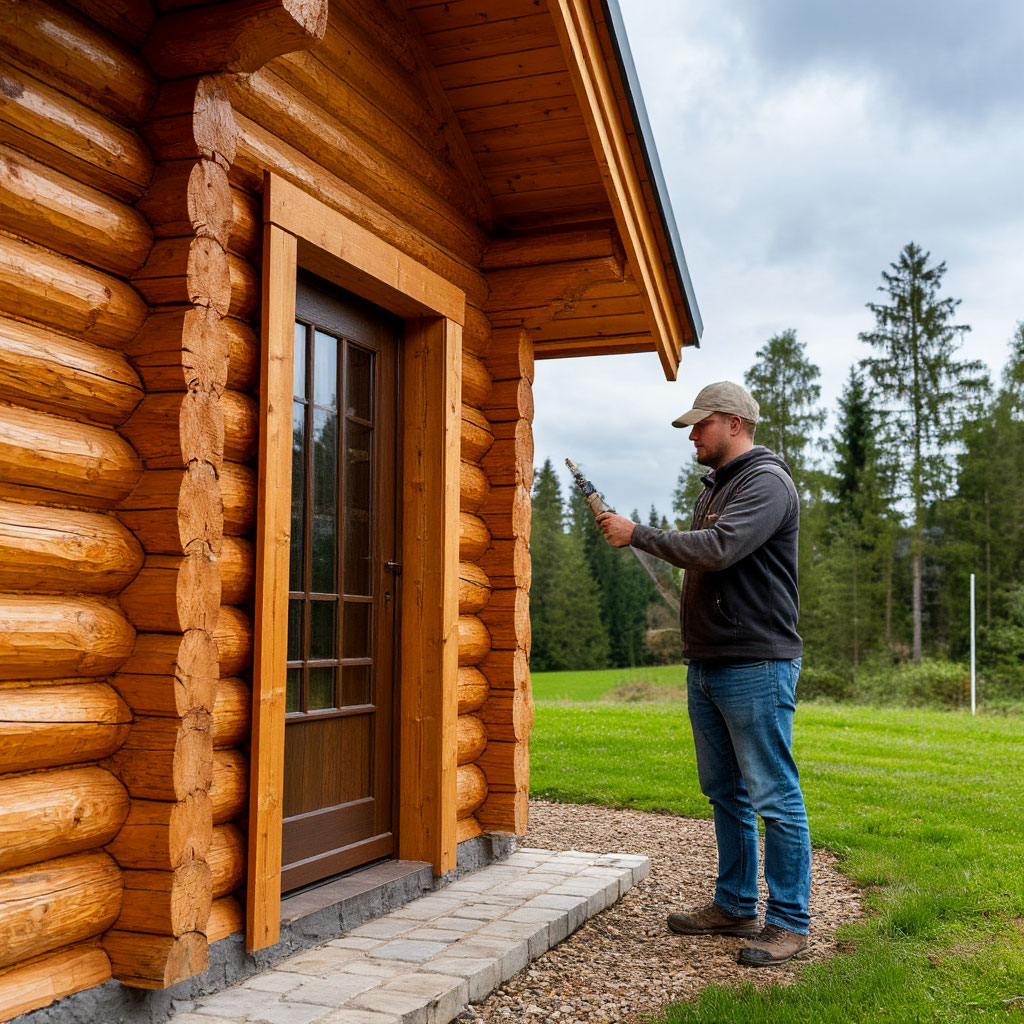
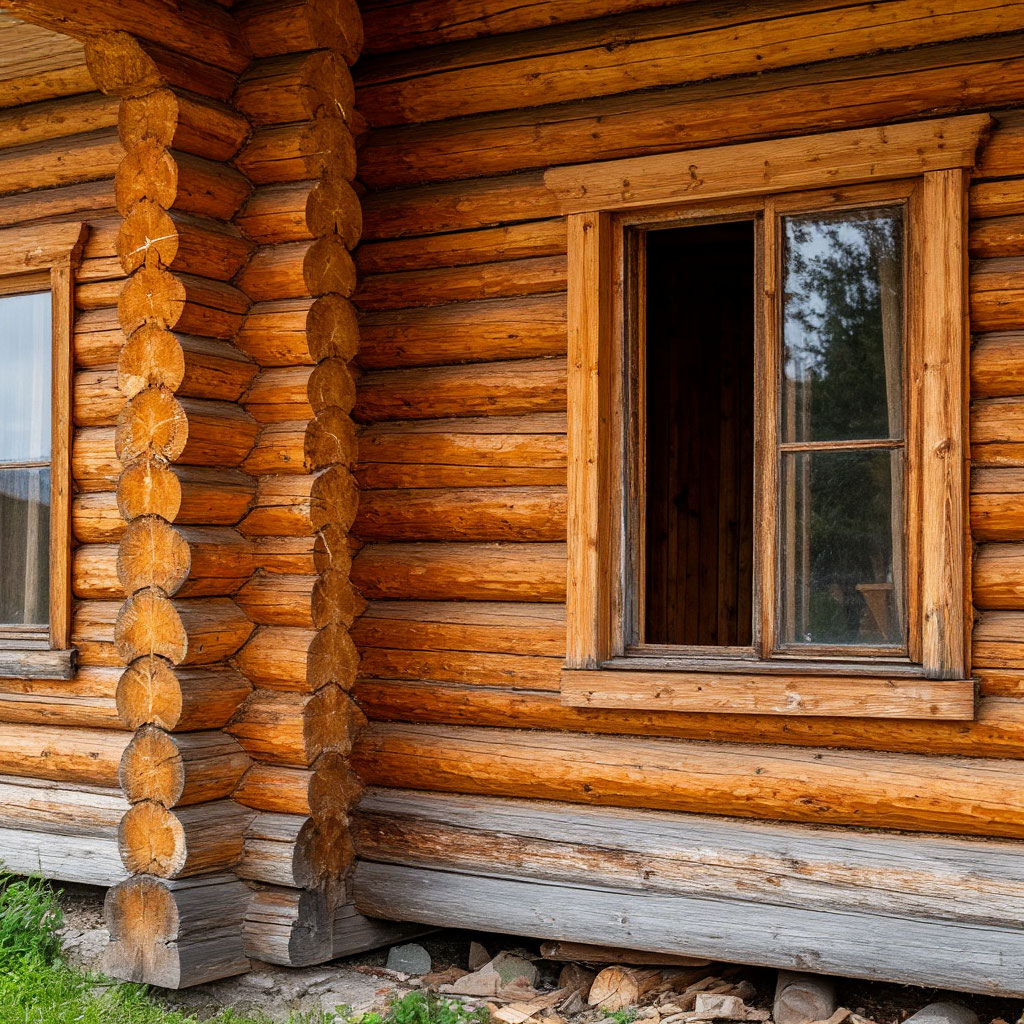
Regular Inspection Habits That Save Money
Smart DIY log home maintenance starts with regular inspections. Twice a year — ideally in the spring and fall — walk the perimeter of your home with a notepad. Look for hairline cracks in the mortar or small separations in the synthetic sealant where the logs meet. Pay special attention to the north side, where the weather hits hardest, and the areas around windows and doors, which sag the most.
During inspections, carry a tube of patching compound in the correct color to address minor problems immediately. Mark larger problem areas with masking tape for later inspection when you have more time. This simple habit will help you spot minor wear before it becomes a major issue that requires a complete resurfacing of the cracks.
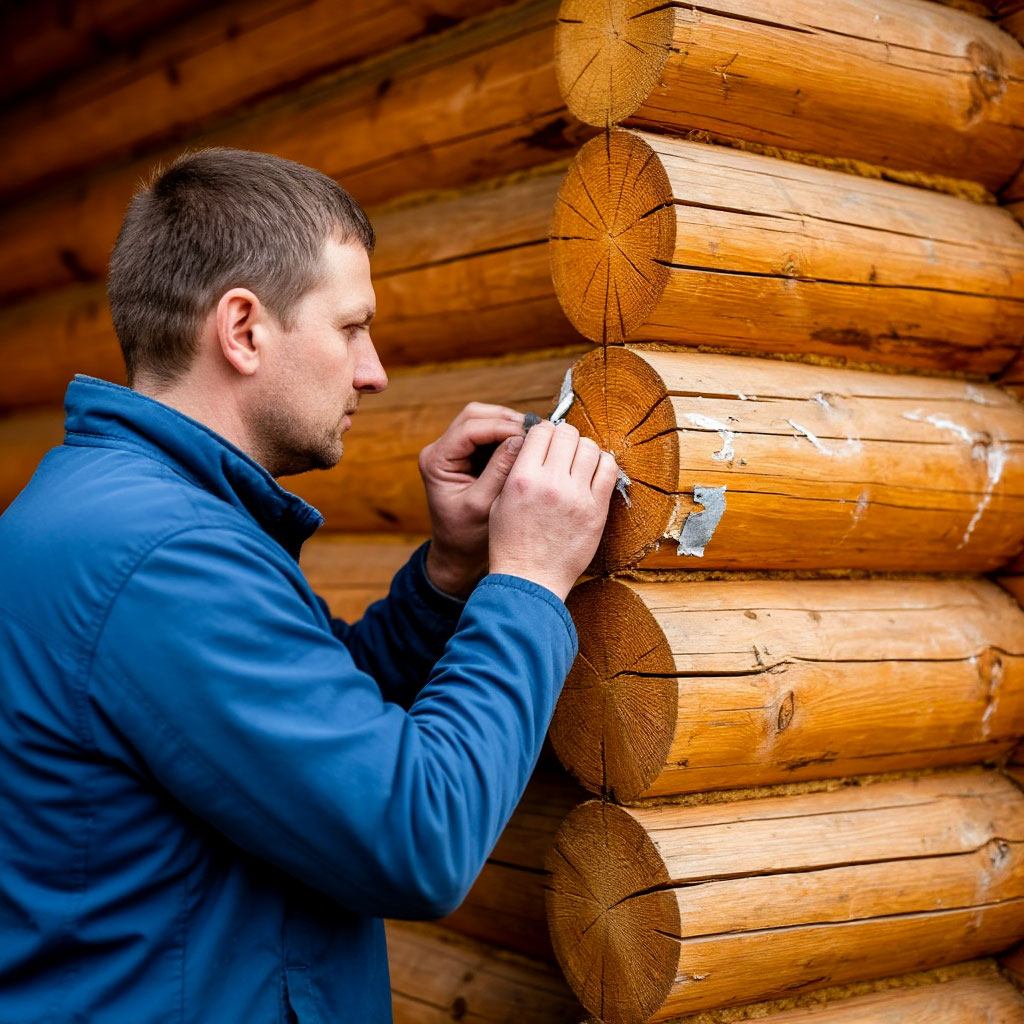
Simple Spot Repairs
If you find damaged areas during an inspection of weather-protected log homes, the repair approach depends on the type of crack. For synthetics, scrape away any loose particles with a narrow brush, then apply fresh patching compound using the same tools and cracking techniques as the original application. Blend the edges smoothly into the existing material for seamless results.
Mortar repairs require a little more effort:
- Use a chisel to trim the damaged area, creating a dovetail shape that will help the new mortar adhere in place.
- Lightly dampen the exposed wood before pressing in fresh mix, then work it to match the surrounding profile.
- Let it cure slowly under burlap for best strength.

When Partial Repainting Is Necessary
Sometimes spot fixes won’t do the trick. If wear is evident in multiple sections or you notice consistent sagging points, partial repainting may be necessary. This doesn’t mean you have to repaint the entire cabin — just methodically address problem areas. Work in logical sections, such as one wall at a time, to maintain a consistent look and performance.
For a synthetic log cabin repaint, this often means removing about 10-15% of the material and replacing it with fresh product. When using a solution, you may need to replace larger sections as the material ages evenly. Always prepare surfaces thoroughly before applying a new repaint, just as you did with the original installation.
Extending the Life of a Repaint with Prevention
The best cabin repainting material lasts longer with proper care:
- Install rain gutters over vulnerable areas to minimize water exposure.
- Avoid direct spray from the walls as constant moisture will accelerate wear.
- Trim vegetation that rubs against the repaint or holds moisture in the logs.
For cabins in intense sun, consider clear coatings with UV protection instead of synthetic siding (check the manufacturer’s recommendations first). When using mortar, a light lime wash every few years refreshes the surface without reducing breathability. These small steps can add years to the effective life of your siding.
Determining When a Complete Replacement Is Needed
Most high-quality synthetic siding, rather than mortar siding, will wear out over time. Telltale signs include:
- widespread cracks;
- constant peeling of material from the logs;
- visible shrinkage leaving gaps.
If more than 30% of your siding shows significant wear, a complete replacement often makes more sense than endless patching.
New crack technologies may have improved since your last application, too. Today’s formulas offer better flexibility, adhesion, and color retention than products from decades ago. A complete refresh allows you to take advantage of these advances to effectively seal cracks in your log cabin.
Seasonal Maintenance Considerations
Timing is of the essence when DIY log home maintenance. Schedule major crack-sealing jobs for mild, dry weather when temperatures are in the 50–80°F (10–27°C) range. Early fall is often a good time, giving new work time to properly cure before winter. Avoid working in freezing temperatures or extreme heat, which stresses curing materials.
For winter emergencies, such as sudden cracks that allow cold air to enter, use temporary caulks labeled for cold-temperature use. Plan to replace these quick fixes with proper crack-sealing when weather permits. Never apply permanent compounds outside of the recommended temperature ranges, as this will compromise their long-term effectiveness.
Work with a Professional When Necessary
While most maintenance can be done on your own, there are some situations where expert help is needed. If the logs have shifted significantly, causing large gaps to form, a professional assessment will ensure the right solutions. Historic cabins with preservation requirements often require specialized techniques. And when working with old mortar containing lead, proper safety protocols are necessary for removal.
FAQ
Can I just fill log gaps with spray foam instead of doing real log cabin chinking?
No, you really shouldn’t rely on spray foam instead of real log cabin chinking. Foam can seal tiny drafts, but it can’t flex when logs shrink and settle. Once the wood moves, foam can crack and pull away, which lets water and bugs in. Real chinking is made to stretch and stay bonded.
Is log cabin chinking safe around kids and pets, or are the fumes bad?
Yes, modern log cabin chinking is generally safe once it’s cured. Most products today are acrylic or polyurethane based, so the main concern is while it’s still wet. Keep kids and pets away during application and until it firms up. After that, it’s basically inert and acts like a flexible weather seal.
Do I need a contractor for cabin chinking or can I DIY without getting in trouble with inspectors?
No, you usually don’t need a contractor just to apply chinking. Most counties treat chinking as maintenance, not structural work. Inspectors mainly care that the cabin is sealed against water intrusion and pest entry. If the cabin is in a historic or protected area, get approval before changing the exterior look.
How long should I wait before staining or painting around new chinking so it doesn’t peel?
You shouldn’t stain or paint right away. Wait until the new chinking is fully cured, not tacky, and you can press it without leaving a dent. In warm, dry weather that’s often several days, but cool or humid air can push it past a week. If you trap moisture under stain too early, it peels fast.
Can I use regular concrete mix for DIY log cabin chinking, or will that hold up?
No, regular concrete mix is a bad idea for chinking. Concrete sets hard and doesn’t flex, so it cracks and pulls away when the logs move season to season. That creates gaps that suck in water and cold air. Modern synthetic chinking is made to stay slightly elastic, so it keeps sealing even as the cabin shifts.
Many gap manufacturers certify installers who know their products inside and out. These professionals are often able to spot major issues that the untrained eye might miss, making their services valuable for complex jobs or high-value properties.
Whether you choose a traditional mortar or a modern synthetic one, proper log caulking is what will transform a rustic retreat into a weather-proof, energy-efficient home. Regular DIY log house maintenance prevents minor problems from becoming costly repairs. By understanding how to caulk a log house and recognizing when to call in the professionals, you can rest assured that your investment will be worth the effort. From historic charm to modern convenience, effective log house weatherproofing comes down to quality materials, proper application, and timely maintenance. Now enjoy that cozy, well-sealed retreat!